
🌿 Welcome to another APPT Blog Hop!
This month we’re playing with the Aspens of Gratitude Paper Pumpkin Kit, and I decided to take the kit pieces and give them a little PaperTales twist.
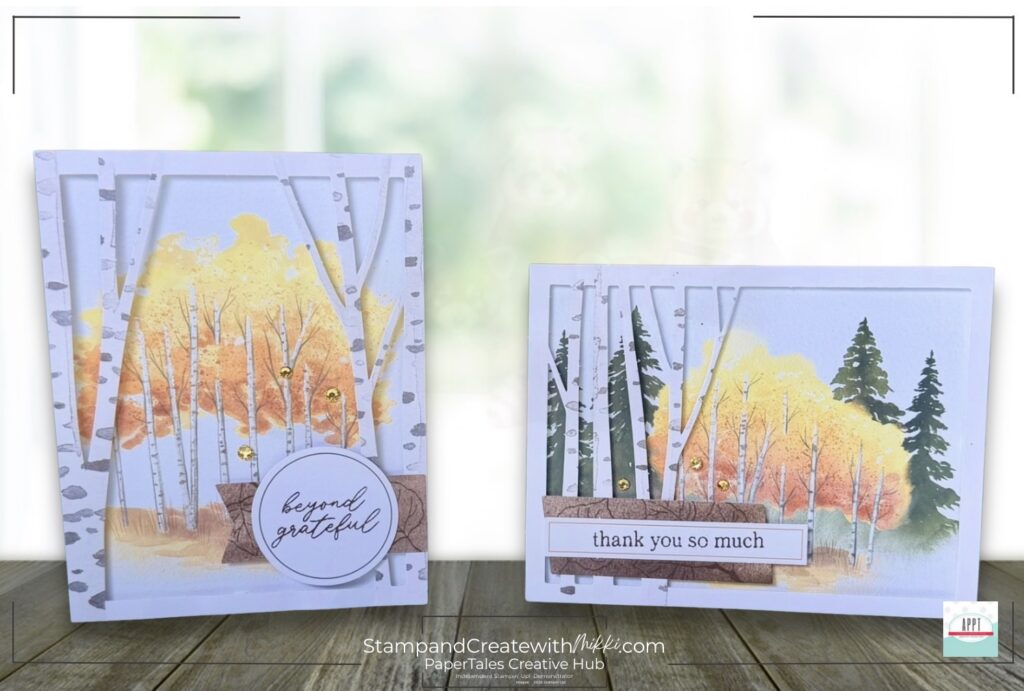
The Aspens of Gratitude Paper Pumpkin kit includes supplies to create 10 cards—5 each of 2 designs—along with 10 envelopes, precut pieces, and self-adhesive gems.
And of course… I couldn’t just leave well enough alone. 😂
I took the beautiful fall colors and pieces from the kit and turned them into Layered 3D Card Designs.
🌿Welcome to the Creative Hub
Here’s what you’ll find below (besides a little creative chaos):
This is a place where cozy creativity meets the moments that matter most – with a little bit of shenanigans sprinkled around.
✂️ A fresh take on this month’s Paper Pumpkin Kit
🌿 A closer look at my fun fold project
📐 Inspiration for thinking outside the kit instructions
📝 Printable measurements and templates
📄 A downloadable PDF tutorial
🔗 Links to explore even more creative projects in this month’s blog hop
If you’re new to the hop, A Paper Pumpkin Thing is all about taking our monthly Paper Pumpkin kits and creating something outside the box—literally!
Instead of simply assembling the projects exactly as designed, we take those same kit supplies and stretch our creativity to see what else we can make.
Each project in this hop features the monthly Paper Pumpkin Kit along with coordinating Stampin’ Up! products.
I’m Mikki Winebrenner from Iowa, and you’ve landed here at the PaperTales Creative Hub!
Be sure to scroll down to the bottom for the full list of participating blogs so you can hop along and see all the creative alternatives everyone has come up with!
Sometimes a Paper Pumpkin kit gives you exactly what you need.
And sometimes you look at those beautiful pieces and think…
“Okay, but what if we went a little further?” 😂
That’s exactly what happened when I started playing with the Aspens of Gratitude Paper Pumpkin Kit.
The original kit has gorgeous fall colors, beautiful watercolor-style artwork and, of course, those amazing aspen trees. I loved the look of the cards as designed, but I wanted to see if I could create a little more depth and dimension with those pieces.
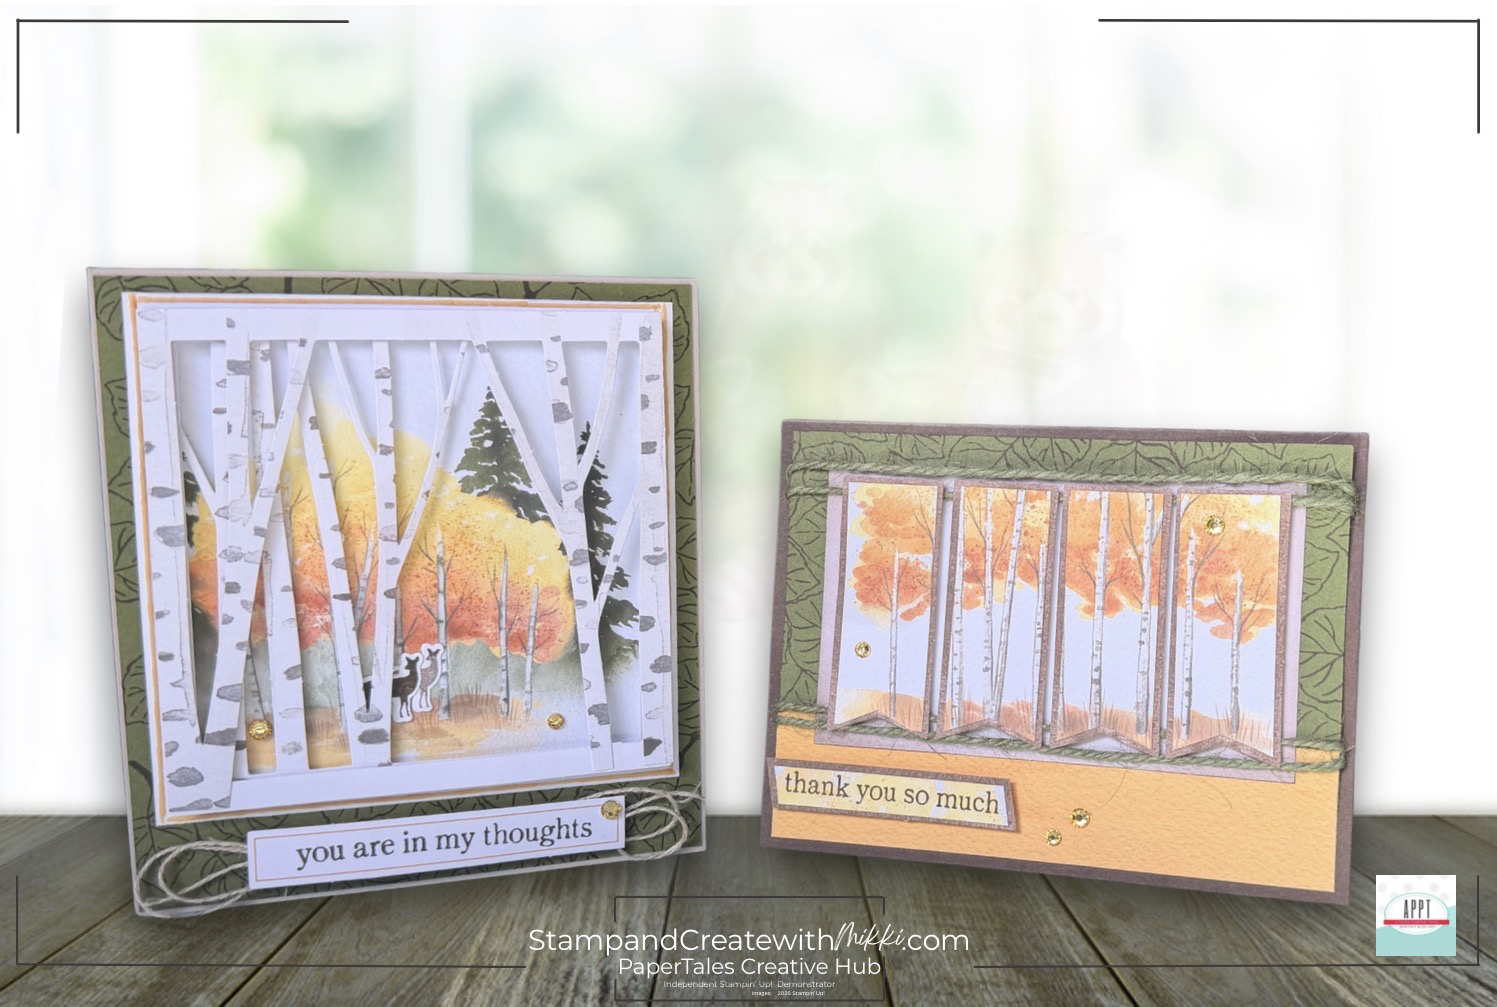
And that’s how A Walk Through the Aspens came to life. 🍂🌲
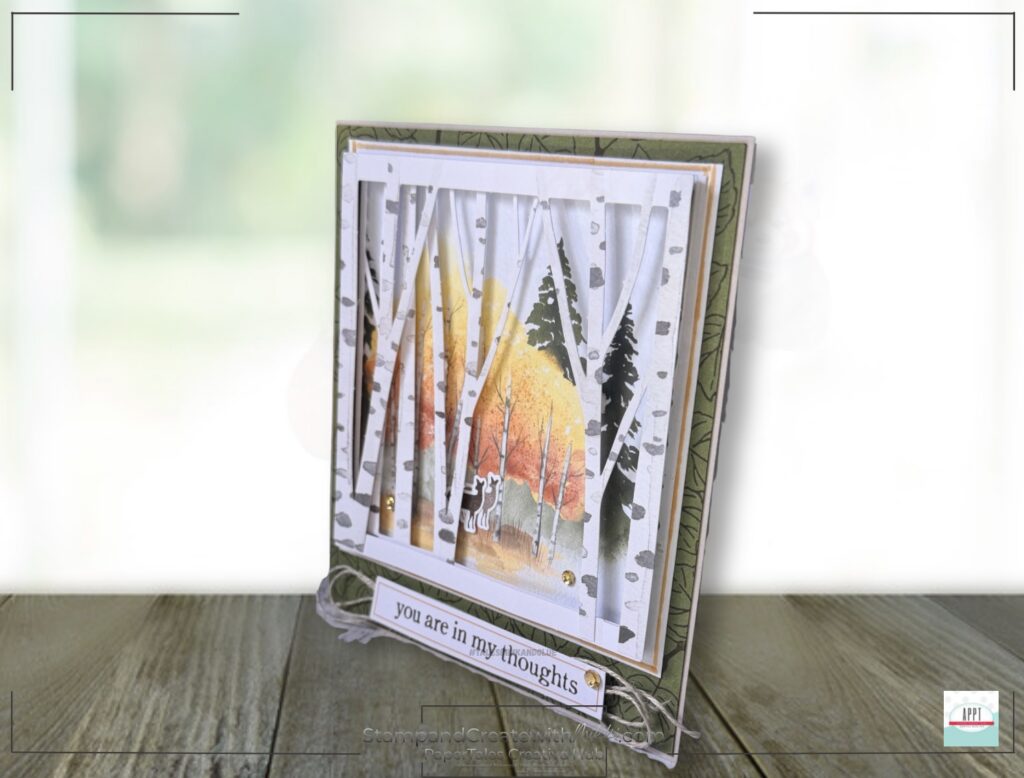
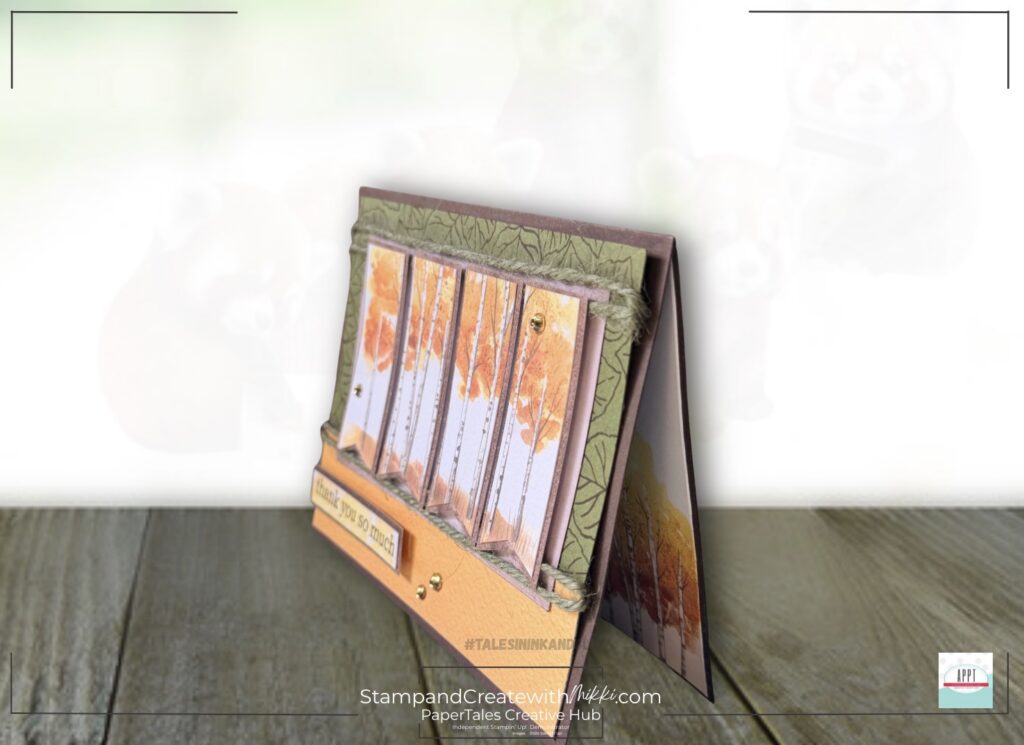
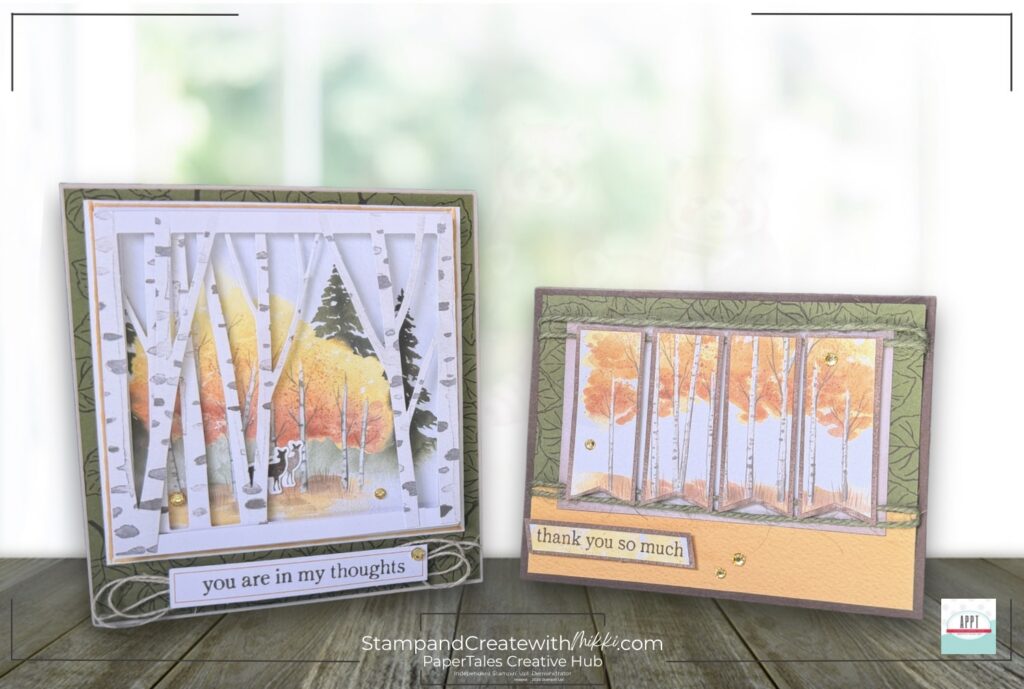
🍂 A Walk Through the Aspens
These aren’t just your traditional cards.
Instead, I played with layers, dimension and placement to create two cards that have a little more going on when you look at them from different angles.
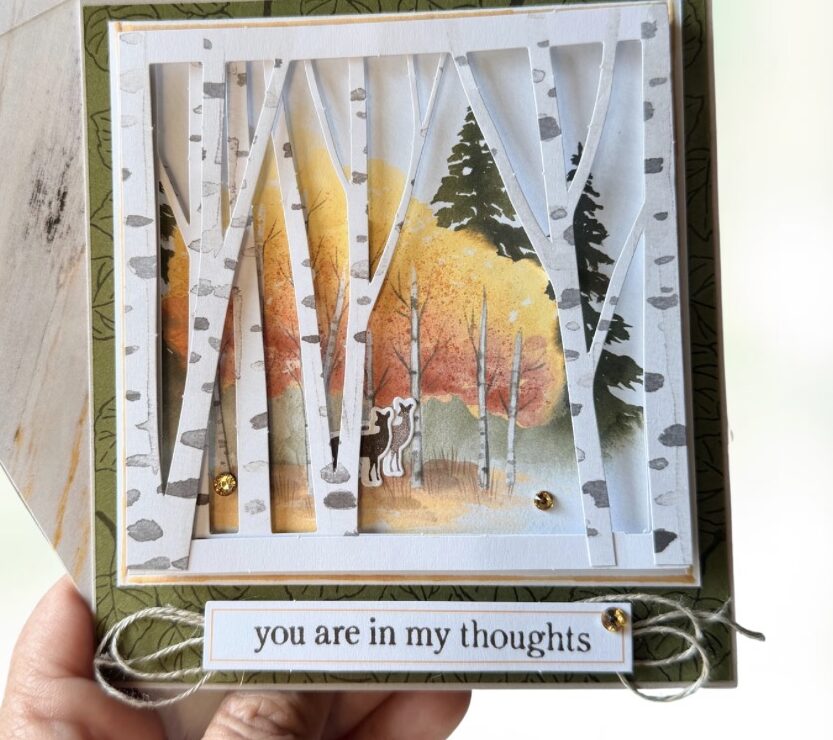
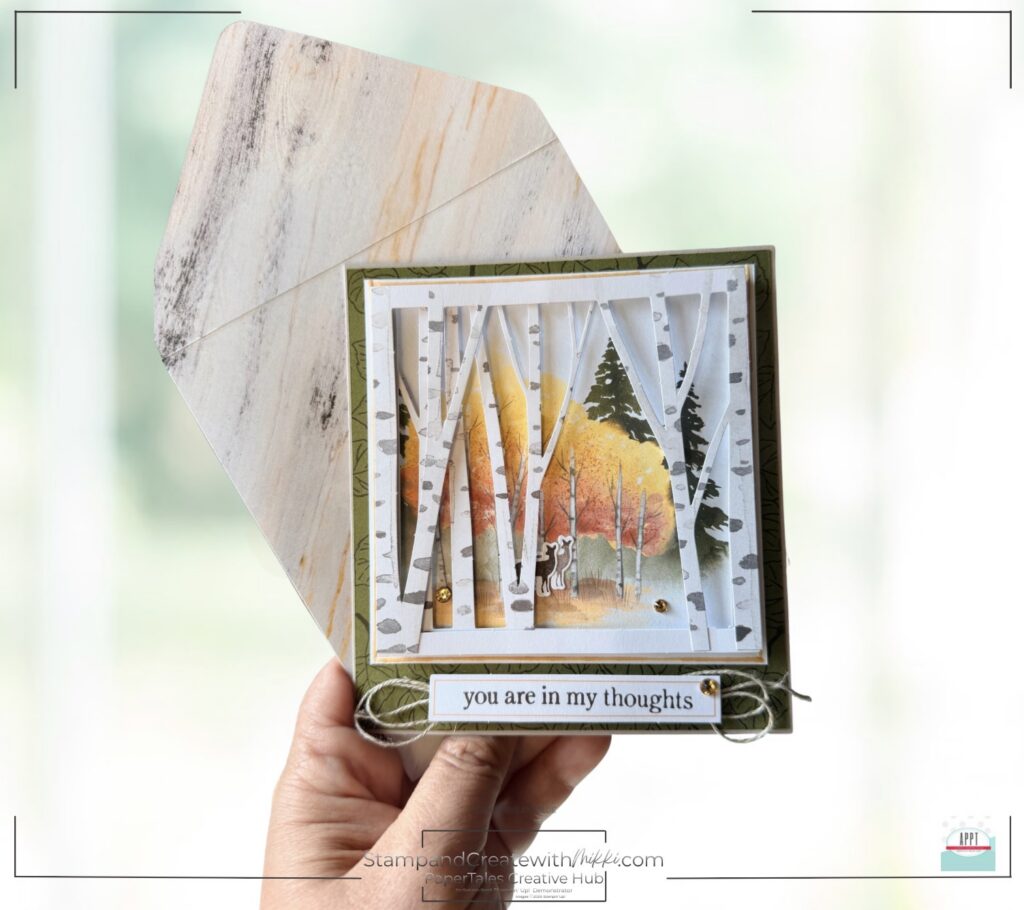
One is a larger-than-usual card that really lets the aspen forest take center stage.
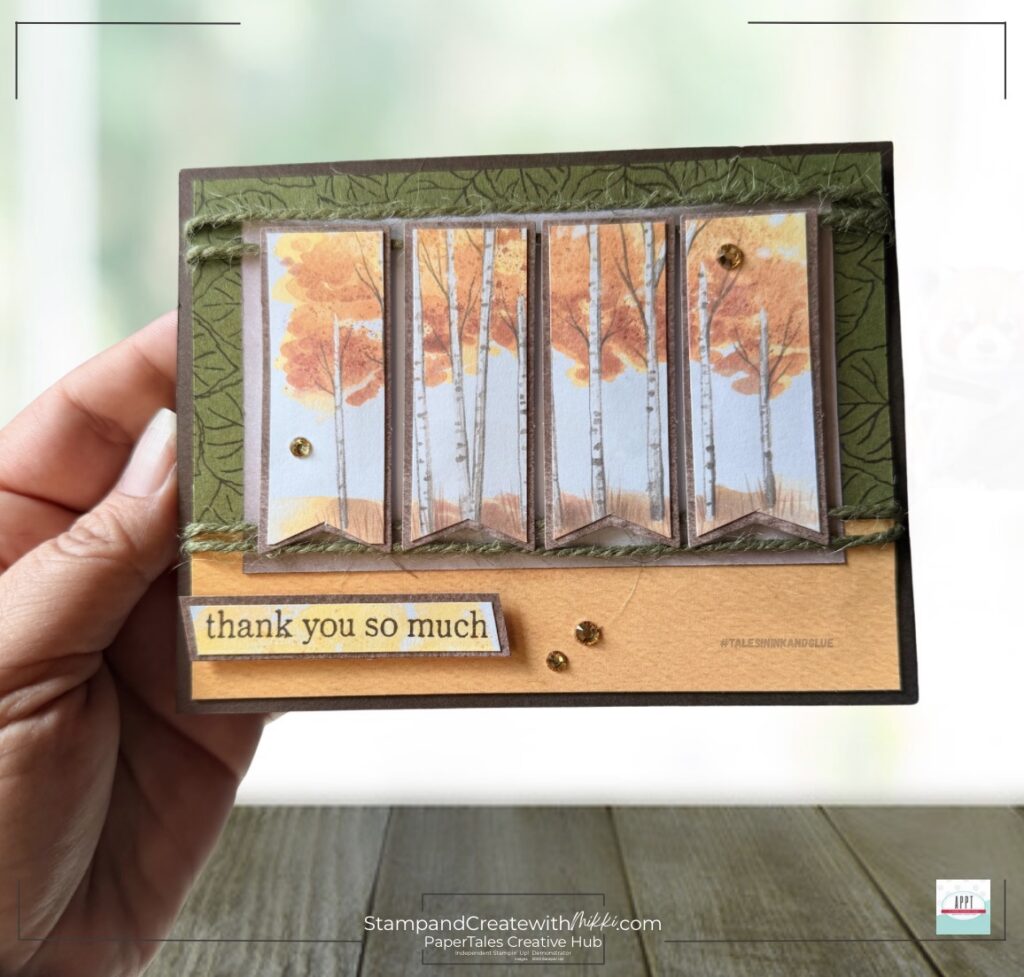
The other is closer to a traditional card size, but I used the same idea of layering the trees and scenery to give the card that 3D, dimensional feel.
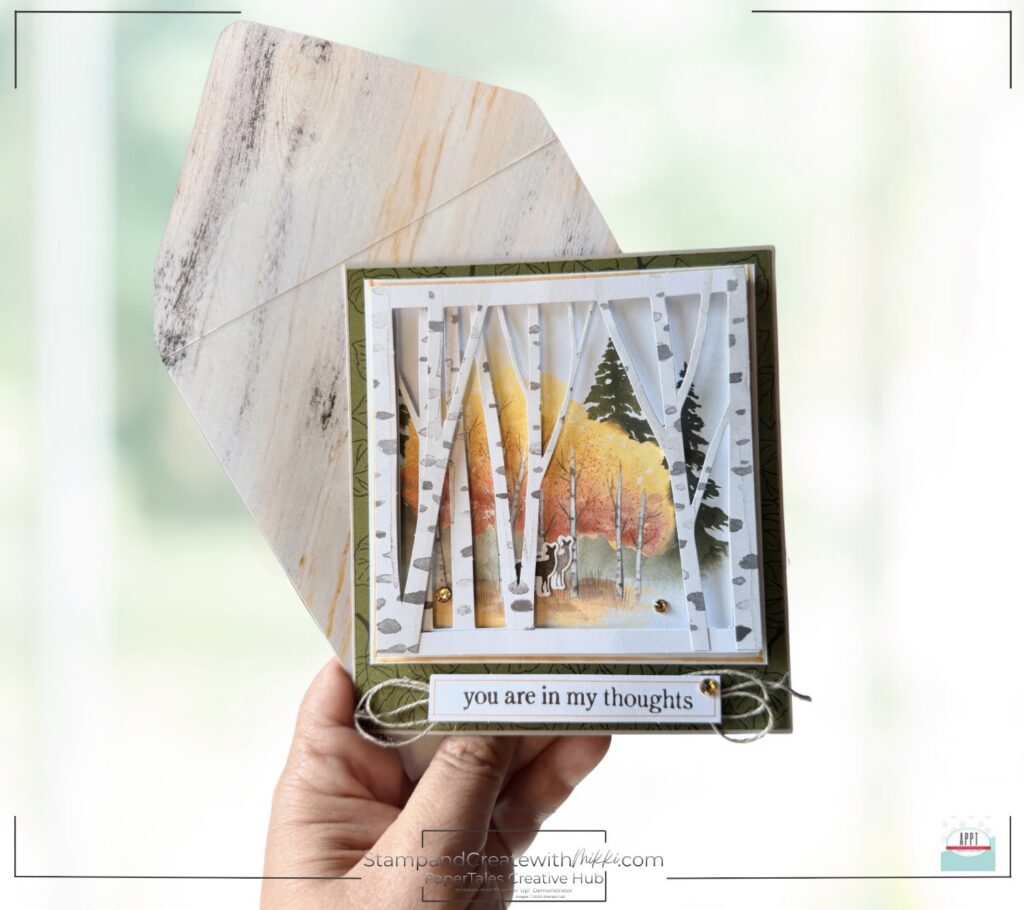
I love how the layers make the forest feel like it continues beyond the front of the card.
It’s almost like you’re looking through the trees instead of simply looking at a picture of them.
And honestly… that’s where the name came from.
A Walk Through the Aspens. 💛
🌸 Keep Creating with the Aspens of Gratitude Refill
🍂 About the Aspens of Gratitude Refill
The Aspens of Gratitude Paper Pumpkin Refill is full of beautiful watercolor aspen imagery in warm autumn colors. 🍁
The refill includes everything you need to create 10 cards—5 each of 2 designs—along with coordinating printed envelopes, precut pieces, adhesive and self-adhesive gems.
The color palette includes Basic Black, Cajun Craze, Daffodil Delight, Early Espresso, Golden Glow, Gray Granite, Mossy Meadow and Pumpkin Pie.
And if you know me, you probably already know where this is going… 😂
I didn’t quite leave the cards as they came. I took those beautiful kit pieces and added some layers and dimension to create my A Walk Through the Aspens cards.
Please note: Current Paper Pumpkin subscribers can purchase the refill. 🍂
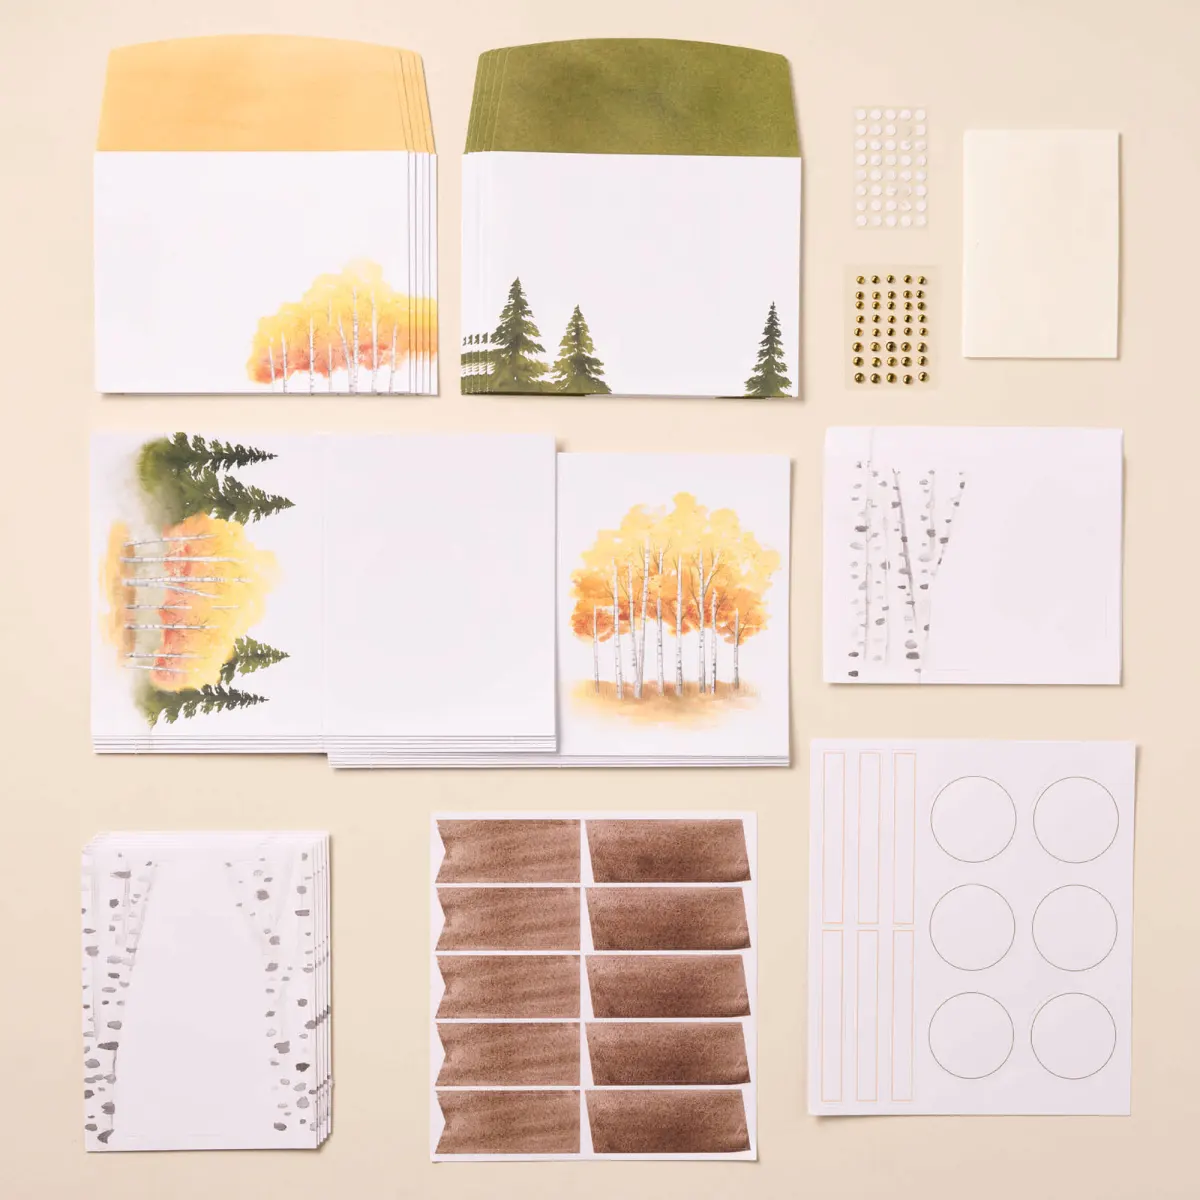
🌲 Creating the Dimension
The secret to these cards isn’t a complicated fold.
It’s the layers.
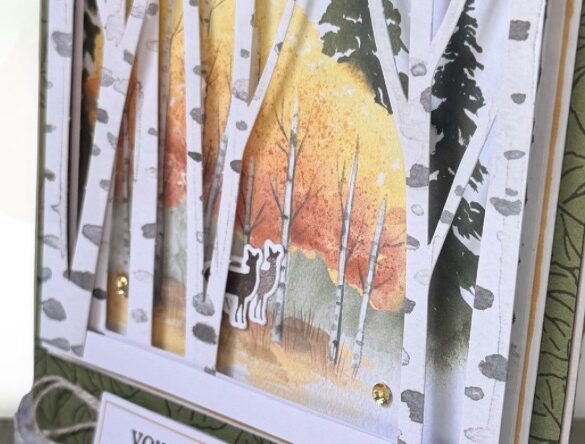
By separating the different pieces of the artwork and adding dimension between them, the flat pieces begin to create a little scene.
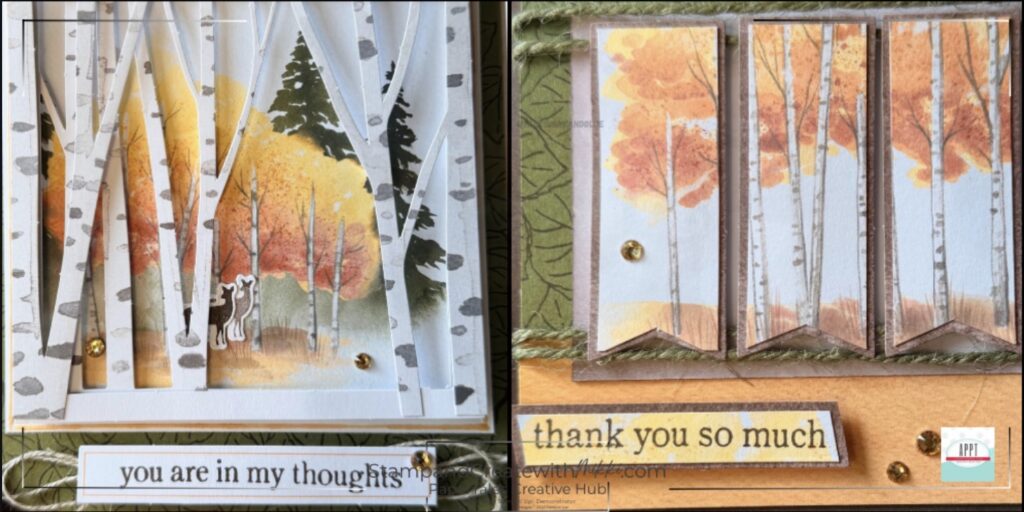
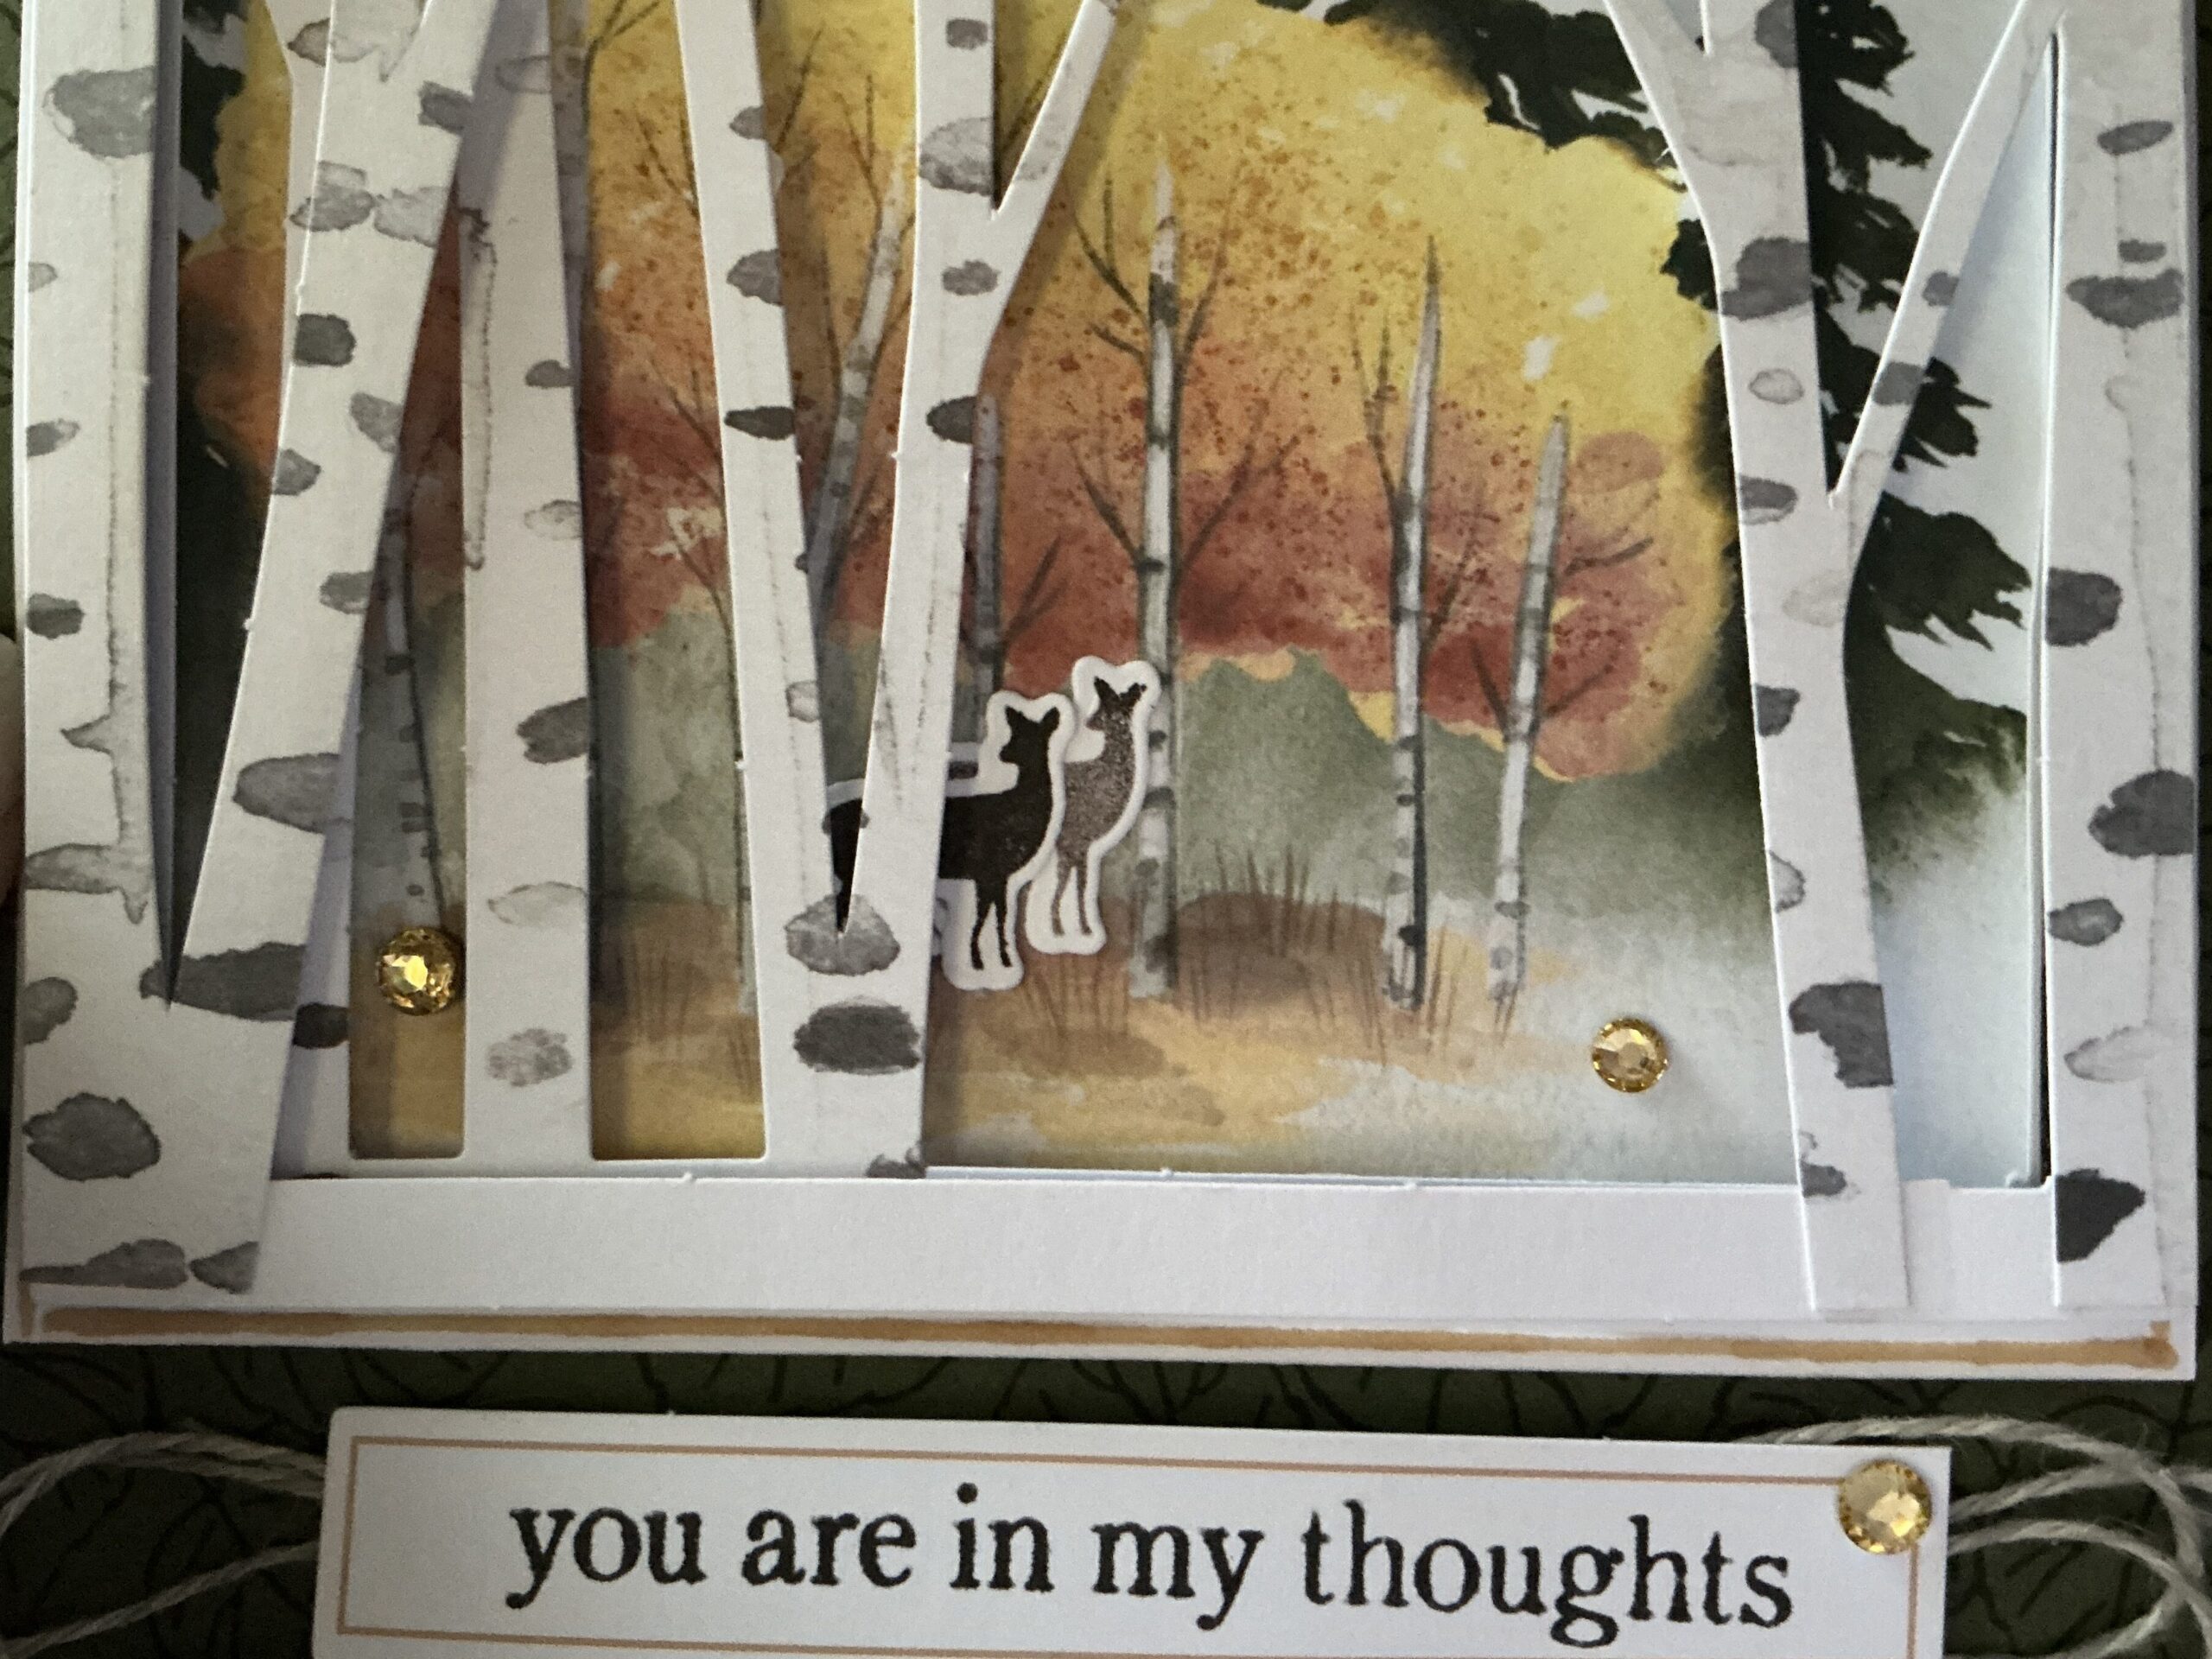
For the larger card, I wanted the birch trees to become the focal point, so I layered them in front of the beautiful fall background.
The trees create a frame around the scene while allowing the colors of the original artwork to peek through.
A few strategically placed embellishments add a little sparkle without taking away from the scenery.
🍁 The Second Design
Of course, once I had the first card figured out, I couldn’t stop there.
Because apparently one dimensional aspen forest wasn’t enough. 😂
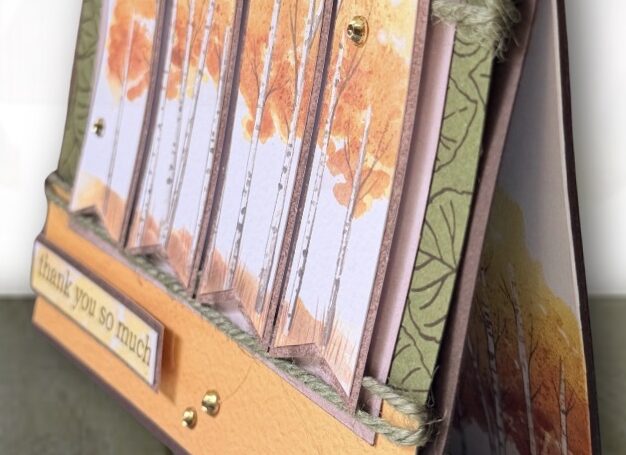
For the second design, I used the same basic concept but created a more traditional-sized card.
The layers still give it that 3D effect, but the overall design is a little more streamlined.
I especially love how the individual tree trunks create so much visual interest while the fall colors remain the star of the show.
✂️ Let’s Make It!
Supplies
From the Aspens of Gratitude Paper Pumpkin Kit:
- Aspens of Gratitude card kit pieces
- Printed card pieces
- Envelopes
- Embellishments
- Stamp set
- Other kit components as needed
Additional Stampin’ Up! Supplies:
- Welcome Noel Bundle (English)
- Basic White 8 1/2″ X 11″ Cardstock
- Mossy Meadow 8-1/2″ X 11″ Cardstock
- Early Espresso 8-1/2″ X 11″ Cardstock
- Gray Granite 8-1/2″ X 11″ Cardstock
- Linen Thread
- Neutrals Jute Combo Pack
- Stampin’ Cut & Emboss Machine
- Blending Brushes
- Mini Glue Dots
- Mini Stampin’ Dimensionals
- Multipurpose Liquid Glue
📏 Measurements
Larger Card
- Gray Granite Base: 5-1/2” x 10”
- Basic White Mats:4-1/2” x 4-1/2”, 4-1/4” x 4-3/4”
- Mossy Meadow Mat:
- Kit card Base: 3-1/4” x 3-1/4”
- Tree Cuts: 3-1/4” x 3-1/4” – you will need to piece the trees back together to form a square. See photo below
🍂 Putting It Together
- Step 1
- Start by preparing your card base and the pieces you’ll be using for the layered scene.
- Also stamp 2 deer from the Welcome Noel Bundle and cut out.
- Step 2
- Layer the aspen trees and background pieces so that each section sits slightly forward from the one behind it.
- This is where the dimension really starts to happen.
- Step 3
- Continue adding your layers, making sure the trees and scenery remain visible from the front.
- Step 4
- Add your sentiment, Deer and embellishments.
- I kept the embellishments fairly simple because there is already so much happening in the artwork.
- Step 5
- Take a step back and admire your little forest scene!
💛 A Little Gratitude
One of the things I love most about the Aspens of Gratitude Kit is how easy it is to take the beautiful artwork and make it your own.
The kit gives you a starting point.
From there, you can follow the original instructions, change the layout, add layers, create dimension—or completely wander off in your own crafty direction.
Which, let’s be honest, is usually where I end up. 😂
For these cards, I wanted to create something that felt like you could actually walk into the forest.
A little more depth.
A little more dimension.
And a whole lot of autumn.
🍁 Want to Try It?
If you have the Aspens of Gratitude Paper Pumpkin Kit sitting in your craft room, pull it out and see what you can create!
You don’t have to recreate these cards exactly.
Try adding a few extra layers.
Raise some of the pieces with dimensionals.
Separate pieces of the artwork.
Or just look at the kit a little differently.
Sometimes the best projects happen when you stop following the instructions for a minute and ask…
“What else can I do with this?” 😉
GET READY TO SUBSCRIBE!
Subscribe to Paper Pumpkin for a monthly, all-inclusive crafting kit that’s a fun surprise! Each kit includes a photopolymer stamp set, Premium Stampin’ Spot™, and step-by-step instructions to complete exclusive paper craft projects.
🎄 Coming Next: Noel Greetings
And because apparently we’re moving right into Christmas… 🎄😂
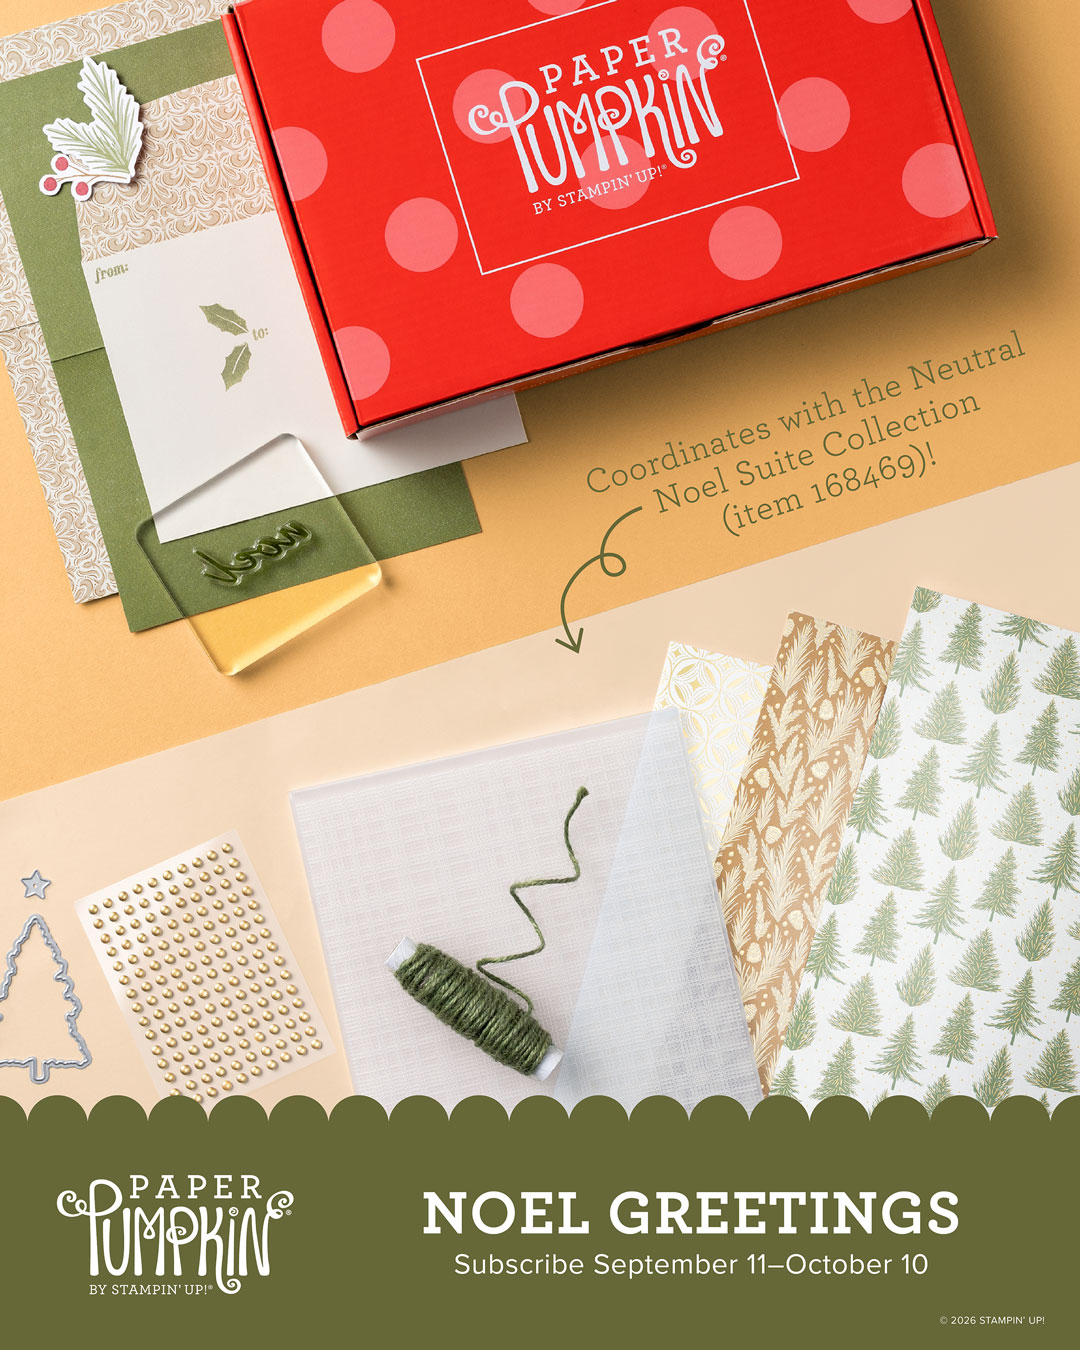
The next Paper Pumpkin Kit is Noel Greetings!
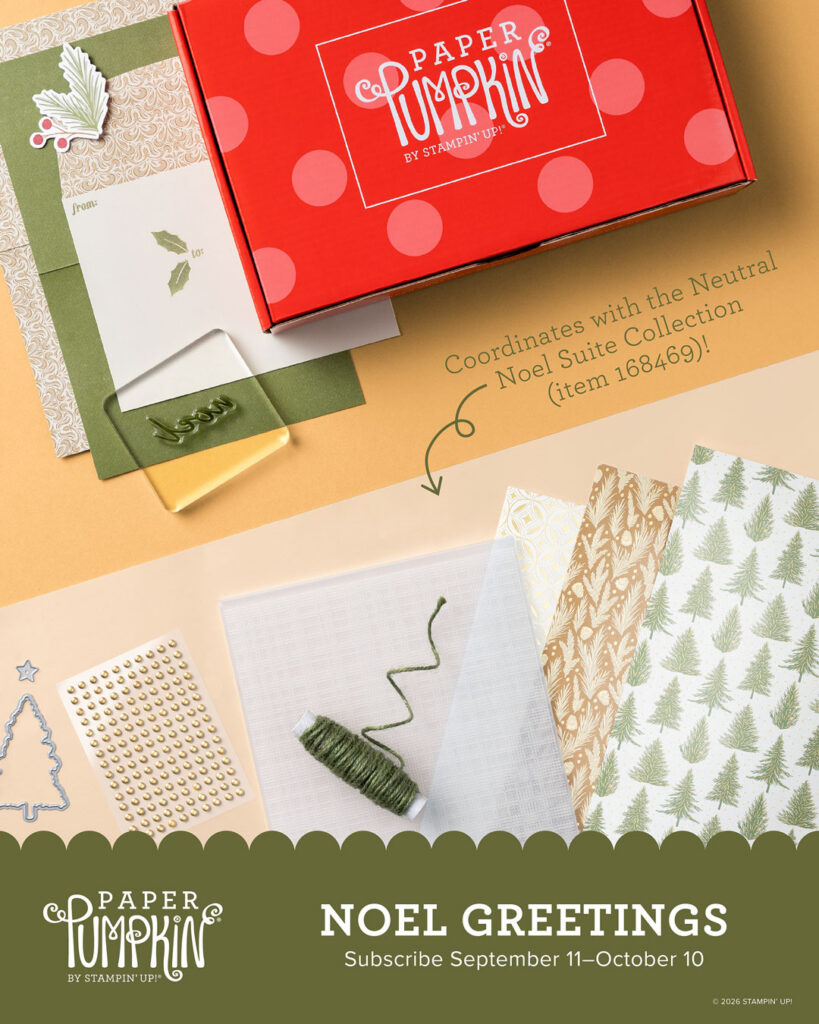
🎄October: Noel Greetings
OCTOBER: NOEL GREETINGS
Subscribe September 11–October 10
Craft elegant, layered Christmas cards in a sophisticated neutral palette.
- Makes 10 cards: 5 each of 2 designs with 10 coordinating envelopes
- Precut paper pieces
- Gold foil accents
- Coordinating colors: Basic Beige, Cherry Cobbler, Crumb Cake, Mossy Meadow (Premium Stampin’ Spot), Pecan Pie
Coordinates with the Neutral Noel Suite Collection (item 168469)!
🍂 Keep Hopping!
Now it’s time to see what the other APPT designers have been creating!
Grab your favorite fall beverage, settle in and hop through the projects. There is always plenty of inspiration waiting for you.
APPT Blog Hop
Click through the A Paper Pumpkin Thing Blog Hop and explore all the different ways this month’s kit has been transformed.
I absolutely love seeing how everyone can start with the same kit and somehow end up with completely different projects.
That’s the magic of creativity. ✂️💚
💛 Thanks for Stopping By!
If you’re a Paper Pumpkin subscriber, I want to know:
Are you someone who…
📦 Makes the projects exactly as designed?
OR
✂️ Looks at the kit and immediately starts wondering what else you can make with it? 😂
I tend to fall somewhere in the second category.
Thanks for spending a little crafty time with me today.
I hope A Walk Through the Aspens inspires you to look at your Paper Pumpkin kits a little differently and maybe add a little extra dimension to your next project.
Until next time…
Keep creating. Keep experimenting. And never be afraid of a little creative chaos. 💚🫶🏻
Happy crafting—and happy hopping!
🎉 Continue the Hop
✂️ Supplies Used
Here are the supplies that helped turn a little creative chaos into these finished projects.
Product List![Paper Pumpkin Subscription [ 166815 ]](https://assets1.tamsnetwork.com/images/EC042017NF/166815s.jpg "Paper Pumpkin Subscription [ 166815 ]")
![Welcome Noel Bundle (English) [ 168465 ]](https://assets1.tamsnetwork.com/images/EC042017NF/168465s.jpg "Welcome Noel Bundle (English) [ 168465 ]")
![Basic White 8 1/2" X 11" Cardstock [ 166780 ]](https://assets1.tamsnetwork.com/images/EC042017NF/166780s.jpg "Basic White 8 1/2\" X 11\" Cardstock [ 166780 ]")
![Mossy Meadow 8-1/2" X 11" Cardstock [ 133676 ]](https://assets1.tamsnetwork.com/images/EC042017NF/133676s.jpg "Mossy Meadow 8-1/2\" X 11\" Cardstock [ 133676 ]")
![Early Espresso 8-1/2" X 11" Cardstock [ 119686 ]](https://assets1.tamsnetwork.com/images/EC042017NF/119686s.jpg "Early Espresso 8-1/2\" X 11\" Cardstock [ 119686 ]")
![Gray Granite 8-1/2" X 11" Cardstock [ 146983 ]](https://assets1.tamsnetwork.com/images/EC042017NF/146983s.jpg "Gray Granite 8-1/2\" X 11\" Cardstock [ 146983 ]")
![Linen Thread [ 104199 ]](https://assets1.tamsnetwork.com/images/EC042017NF/104199s.jpg "Linen Thread [ 104199 ]")
![Neutrals Jute Combo Pack [ 168468 ]](https://assets1.tamsnetwork.com/images/EC042017NF/168468s.jpg "Neutrals Jute Combo Pack [ 168468 ]")
![Stampin' Cut & Emboss Machine [ 149653 ]](https://assets1.tamsnetwork.com/images/EC042017NF/149653s.jpg "Stampin' Cut & Emboss Machine [ 149653 ]")
![Blending Brushes [ 153611 ]](https://assets1.tamsnetwork.com/images/EC042017NF/153611s.jpg "Blending Brushes [ 153611 ]")
![Mini Glue Dots [ 103683 ]](https://assets1.tamsnetwork.com/images/EC042017NF/103683s.jpg "Mini Glue Dots [ 103683 ]")
![Mini Stampin' Dimensionals [ 144108 ]](https://assets1.tamsnetwork.com/images/EC042017NF/144108s.jpg "Mini Stampin' Dimensionals [ 144108 ]")
![Multipurpose Liquid Glue [ 110755 ]](https://assets1.tamsnetwork.com/images/EC042017NF/110755s.jpg "Multipurpose Liquid Glue [ 110755 ]")


Leave a Reply