

Welcome!
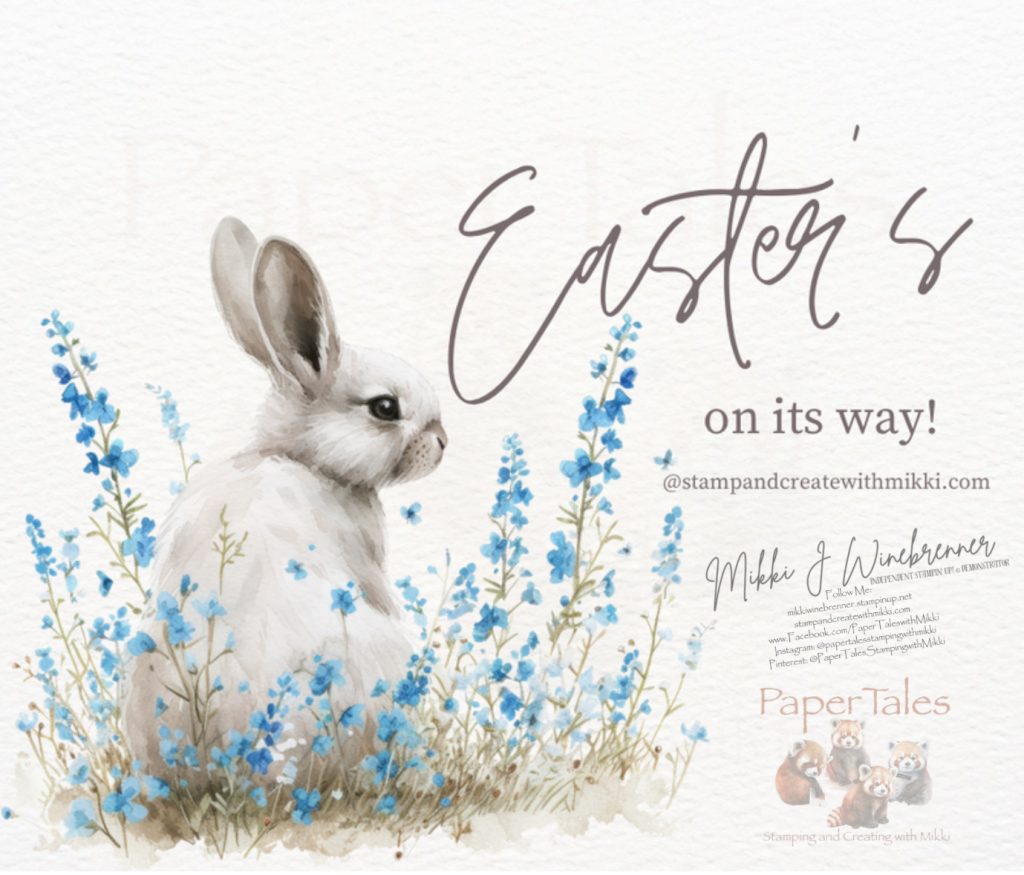
Tonight I have an Easter 3D Pop Out Card for our Easter’s On It’s Way! Series using Stampin’ Up!©️ Faith Collection Photopolymer Stamp Set.
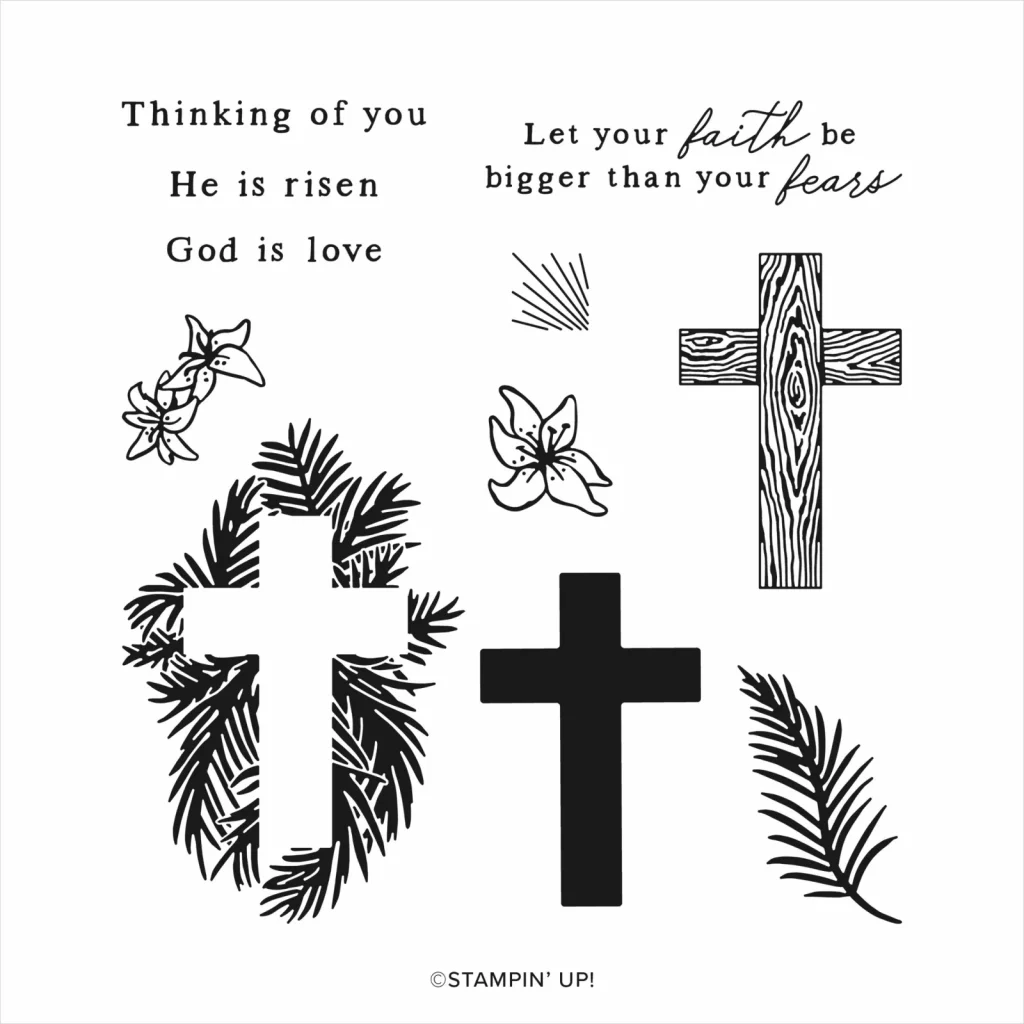
This stamp set is part of the Faith Collection Bundle that can be found on the Online Exclusives page over at my store.
Before we get to the card and all the fun I wanted to explain the reason behind the delay.
While I try to be ahead of things life likes to interfere with plans and I am actually not ahead at all! While I had everything worked out and on who, what, when, where and why for Saturday’s events, timing was just WAY off!
I am slowly learning that I am not in fact wonder mom despite what my brain tells me. We went to a comic book event Saturday and by the time we returned home we were all exhausted. Sunday was a recover day and Monday was a Monday with an ego trip 🫨
Now I’m playing catch up and getting things in order so I can hopefully get ahead of the game this week. Wish me luck!
Enough of the “my life” bits and more to the card making part!
I have only one card to show you this evening. I know it’s a sad thing when there is only 1 but this one is a bit complex but really fun once complete.

This particular style of card is exploding over on on Pinterest and EVERYONE is making them. I LOVE the style and look of the card, DISLIKE the way it folds and it’s size. So I tweaked it to my own liking! Really the only differences are the size of the bases and the way the cross folds.
LETS PLAY!
Starting with the measurements:
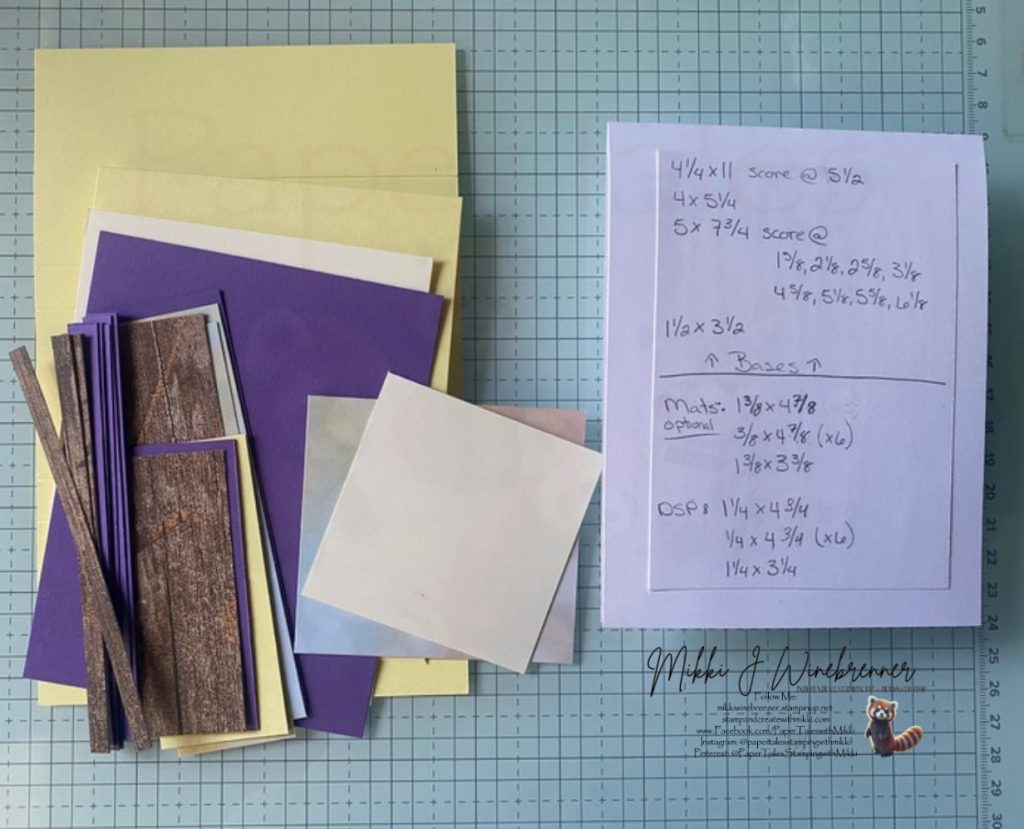
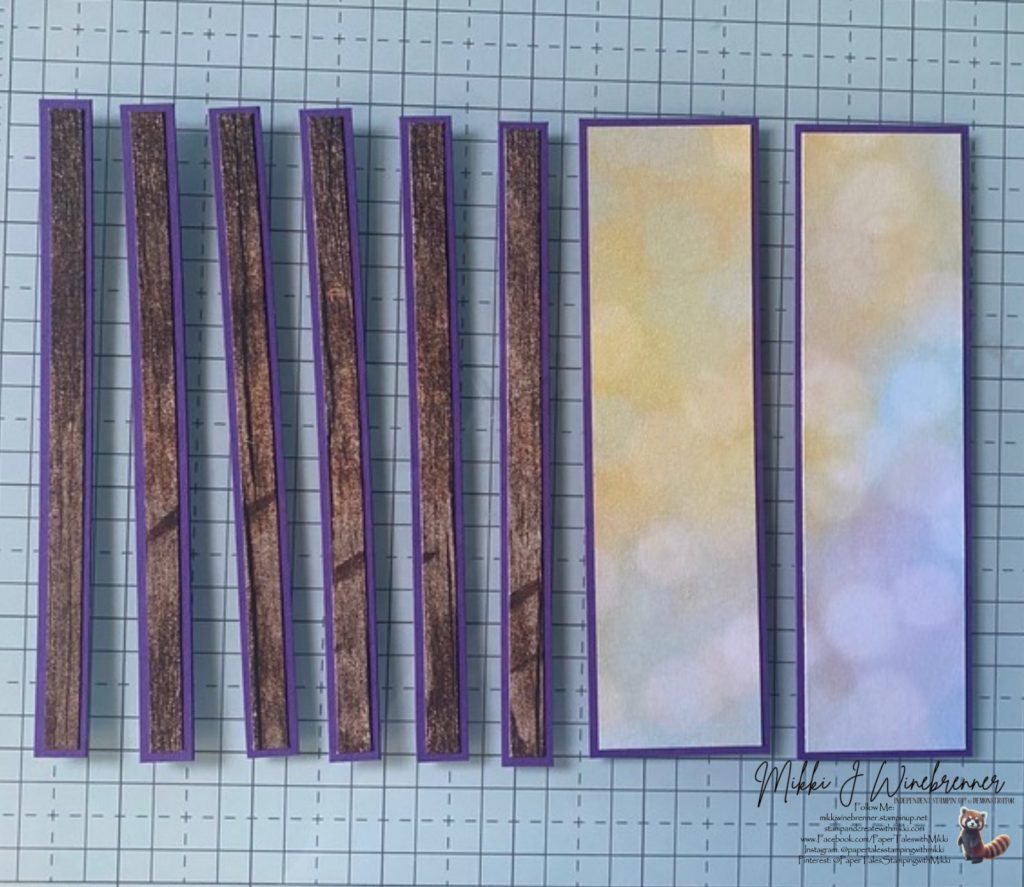
Lemon Lolly 8-1/2” x 11” Cardstock: 4-1/2” x 11” – score at 5-1/2”, 5” x 7-3/4” (scoring listed later) and 1-1/2” x 3-1/2”
Gorgeous Grape 8-1/2” x 11” Cardstock: 4” x 5-1/4”, 1-3/8” x 4-7/8” (x3), 3/8” x 4-7/8” (x6) and 1-3/8” x 3-3/8”
Very Vanilla 8-1/2” x 11” Cardstock: 4” x 5-1/4” and 3” x 3”
Country Woods 12” x 12” DSP: 1-1/4” x 4-3/4”, 1/4” x 4-3/4” (x6) and 1-1/4” x 3-1/4”
Beautiful Bokeh 6” x 6” DSP: 1-1/4” x 4-3/4” (x2)
For ink I am using Lemon Lolly, Garden Green and Gorgeous Grape Classic Stampin’ Pads. I did slip in a little Lemon Lolly Stampin’ Write pen and the Gold Metallic Enamel Effects.
*PSA* All Enamel Effects are retiring 🥺 – I may cry about this one… You will want to stock up and grab them while they are still available! I may or may not have already done that. 😉*
Some will ask about the measurements in the photo above. I glued my measurements on the back of my prototype. Wish I had taken a photo before I cleaned off my desk 🙃 Creating beautiful things can be extremely messy! This image shows you how things can look before when creating the designs.
Lets create!
I am trying a new way of getting the instruction with the photo’s. I’m still learning this new platform and trying a few new things out. If you see something you like or dislike with the instructions please let me know! Your feedback is 100% important!!
Disclaimer: I am using a retired set in this one. Why you ask am I using yet another retired set? Well simply because this brilliant crafter lost a photopolymer stamp that was the key stamp to this card and a few others! I’m winging it and found the sentiment in another set but different font. It is what it is and we will work with what I haven’t lost!

Instructions
- Cut all the paper down to size.
- Note the Gorgeous Grape and Country Woods DSP (x6) pieces are very much optional.
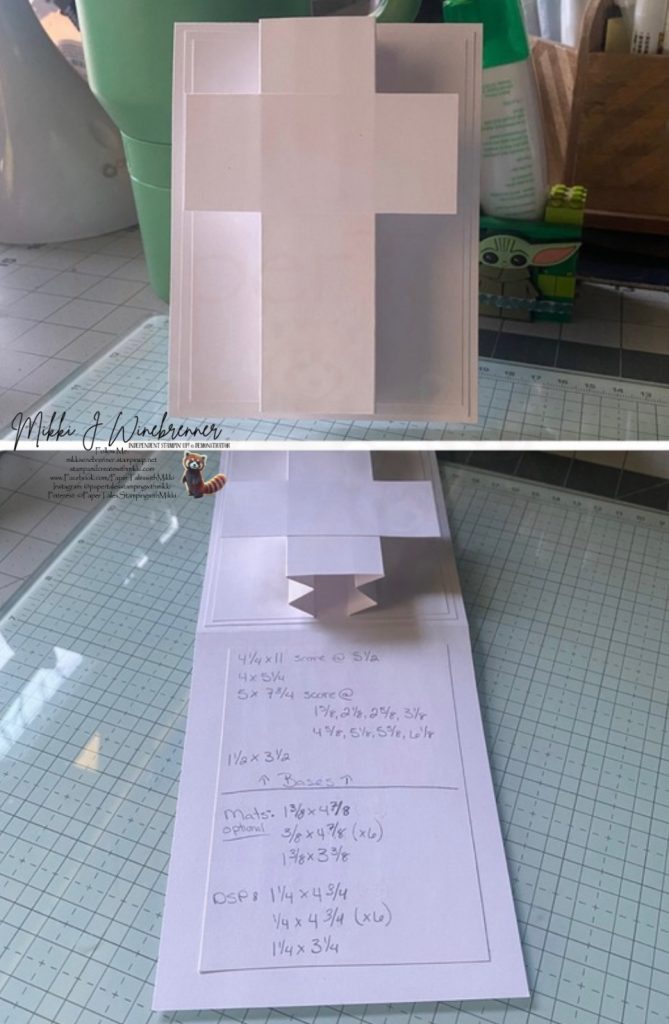
- Scoring for the Lemon Lolly 5” x 7-3/4” are: 1-5/8”x 2-1/8”, 2-5/8”, 3-1/8”, 4-5/8”x 5-1/8”, 5-5/8”, 6-1/8” – all on the Long Side.
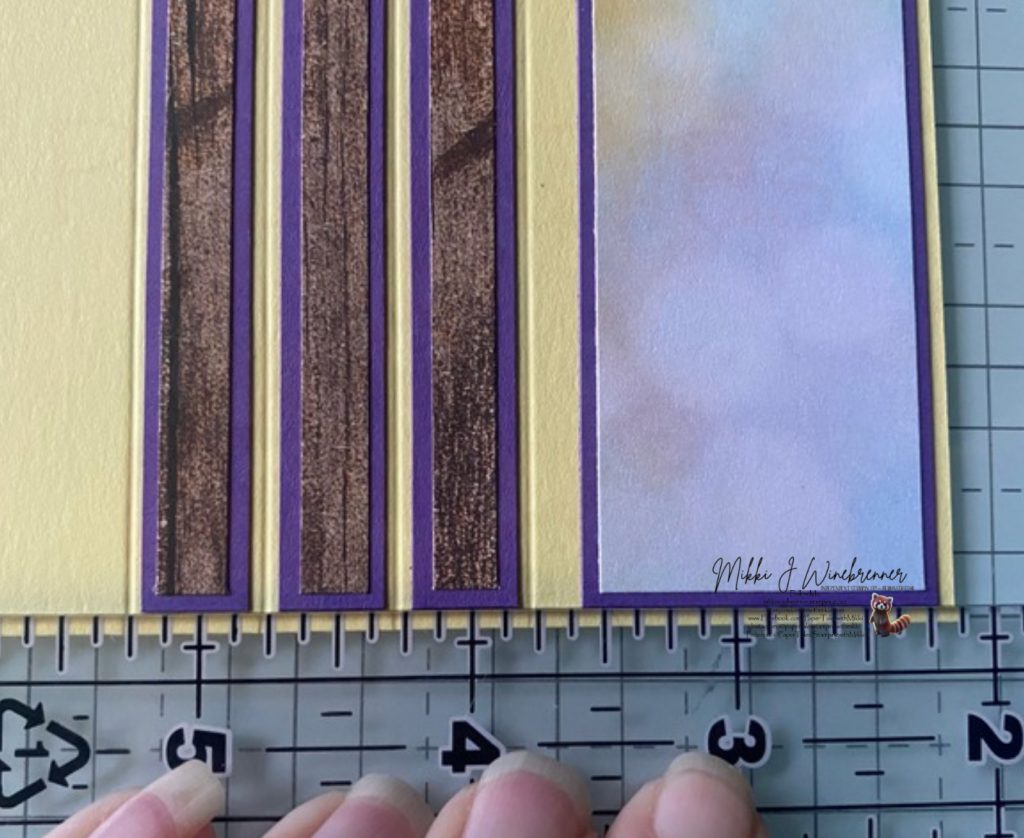
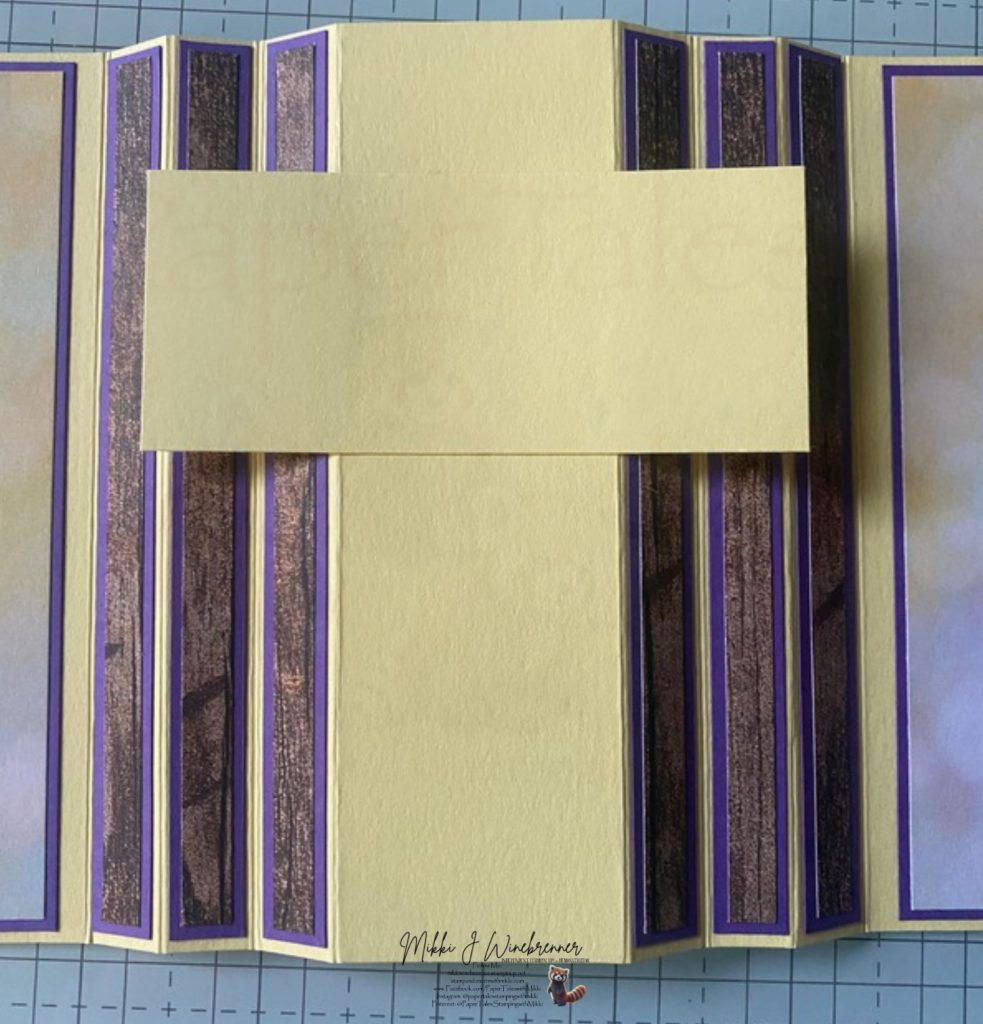
- Attach the 1/4” DSP to the 3/8” Cardstock and the 1-1/4” Beautifully Bokeh DSP to two of the 1-3/8” Cardstock.
- Attach those panels to the the Lemon Lolly 7-3/4” scored base.
- Pro Tip: Attach the larger outside panels first and use a ruler as a guide for placement with the center 3 small panels.
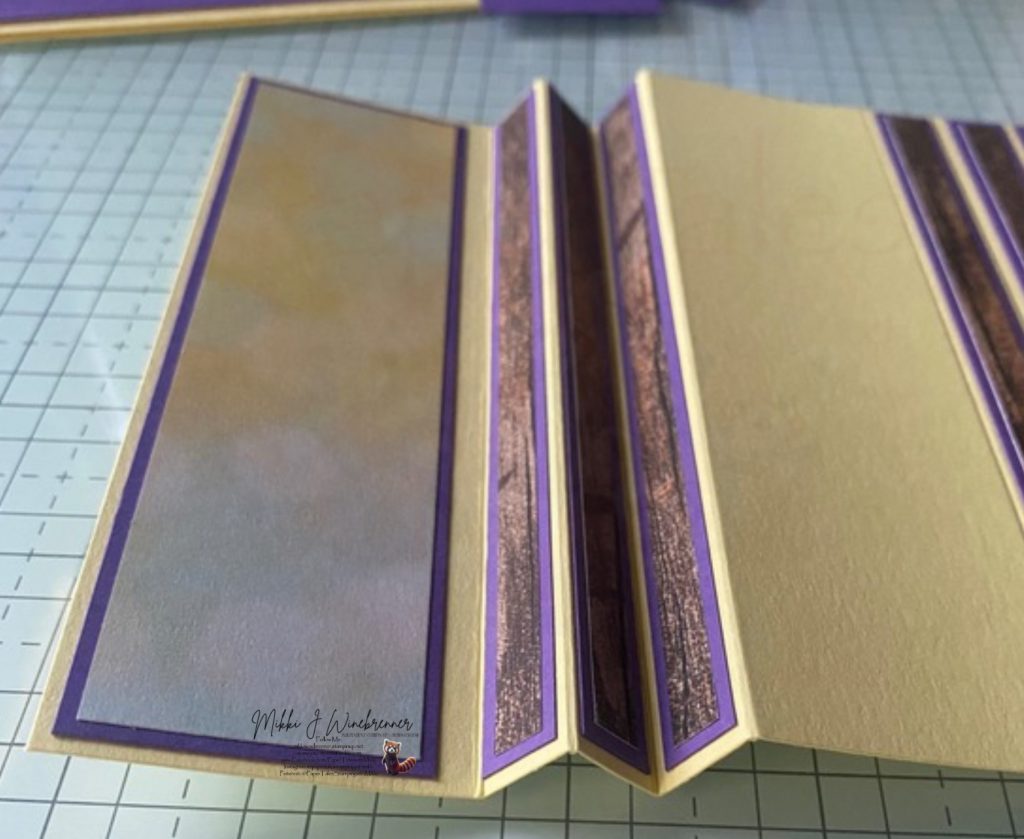
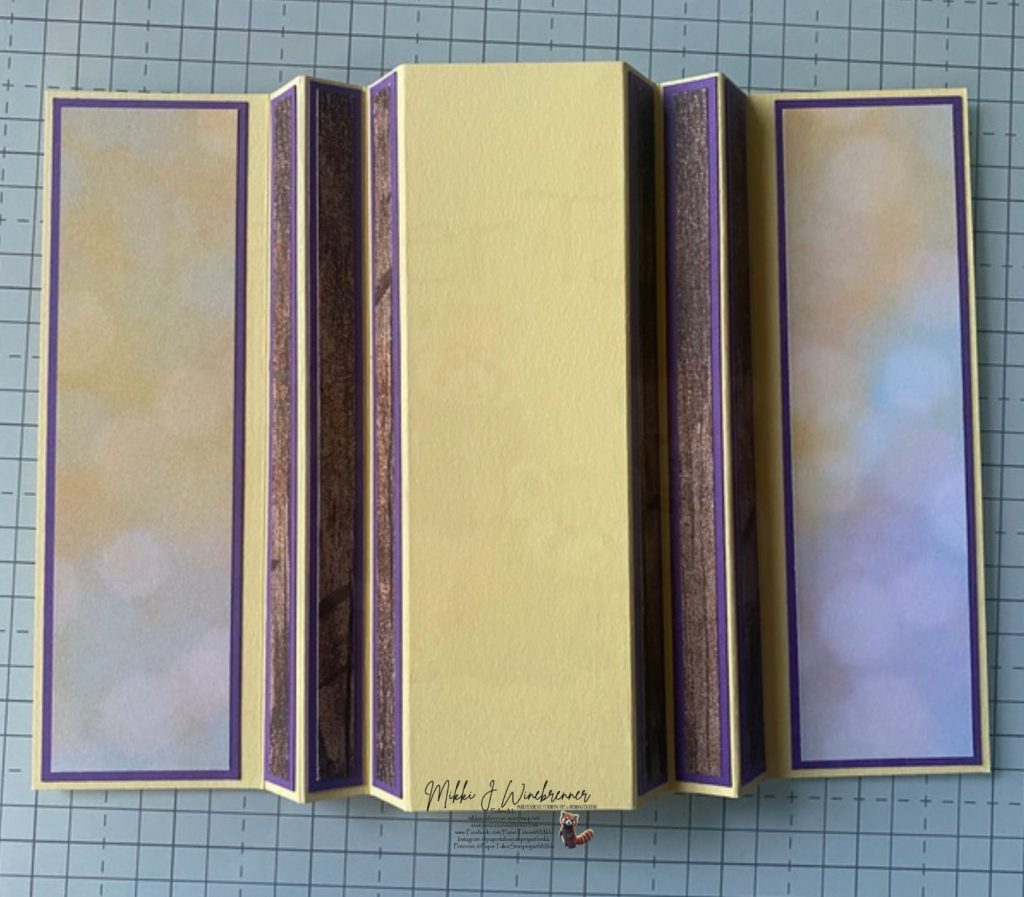
- Time to fold: starting from the left – V, M, V, M, M, V, M, V – basically your making an accordion on each side of the 1-1/2” center.
- Attach the remaining Lemon Lolly to the center section horizontally creating the base of the cross.
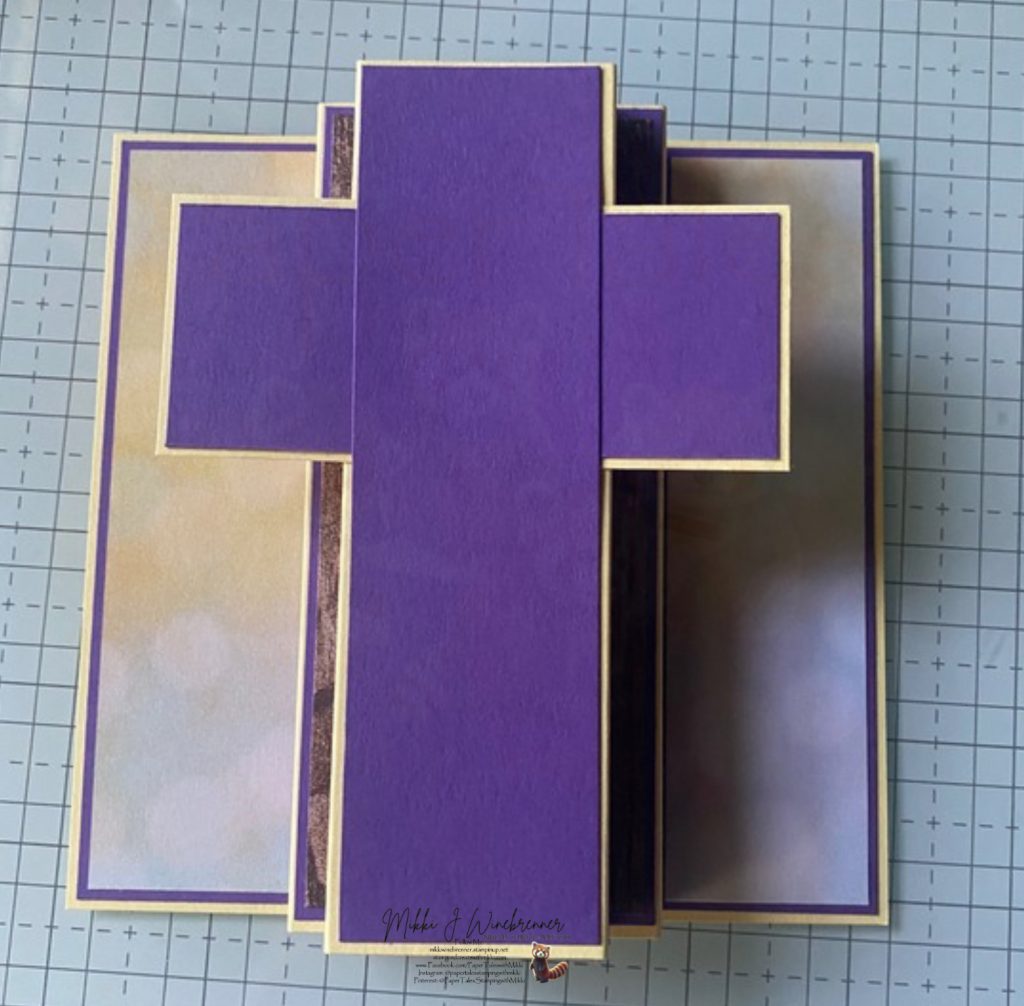
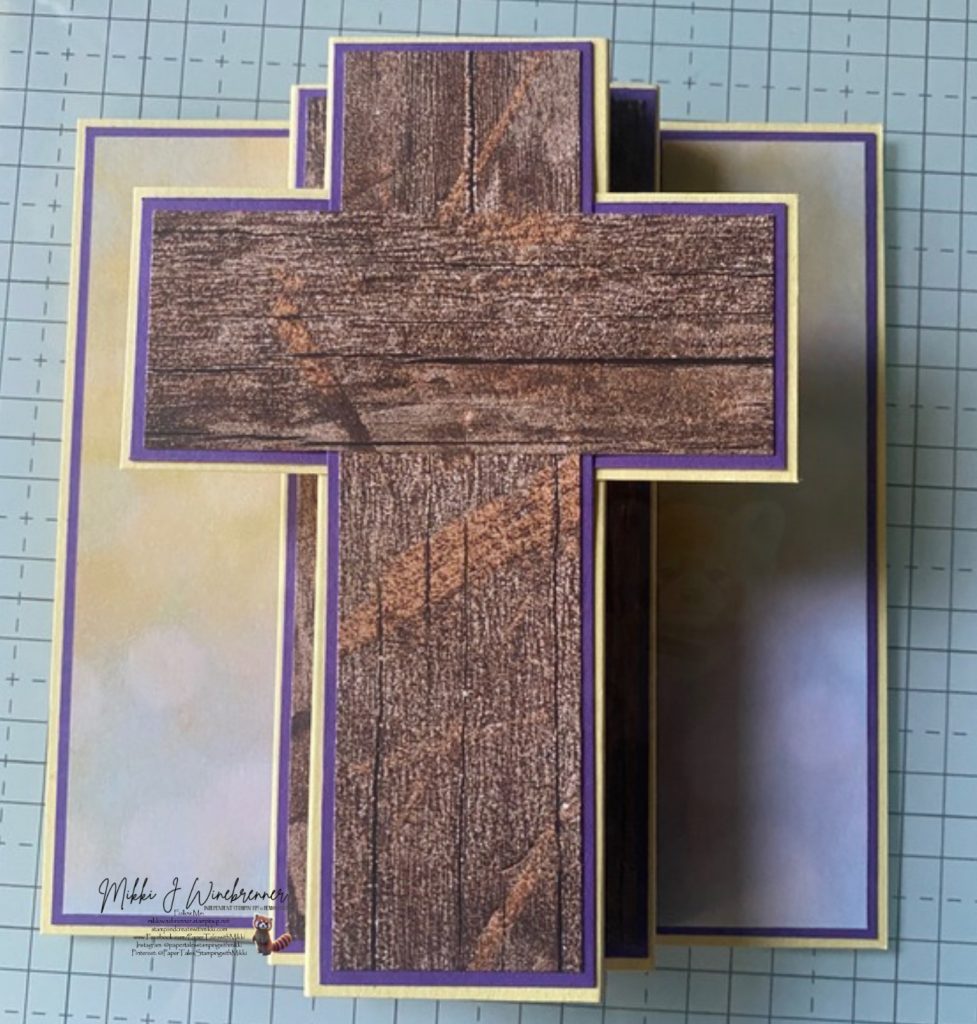
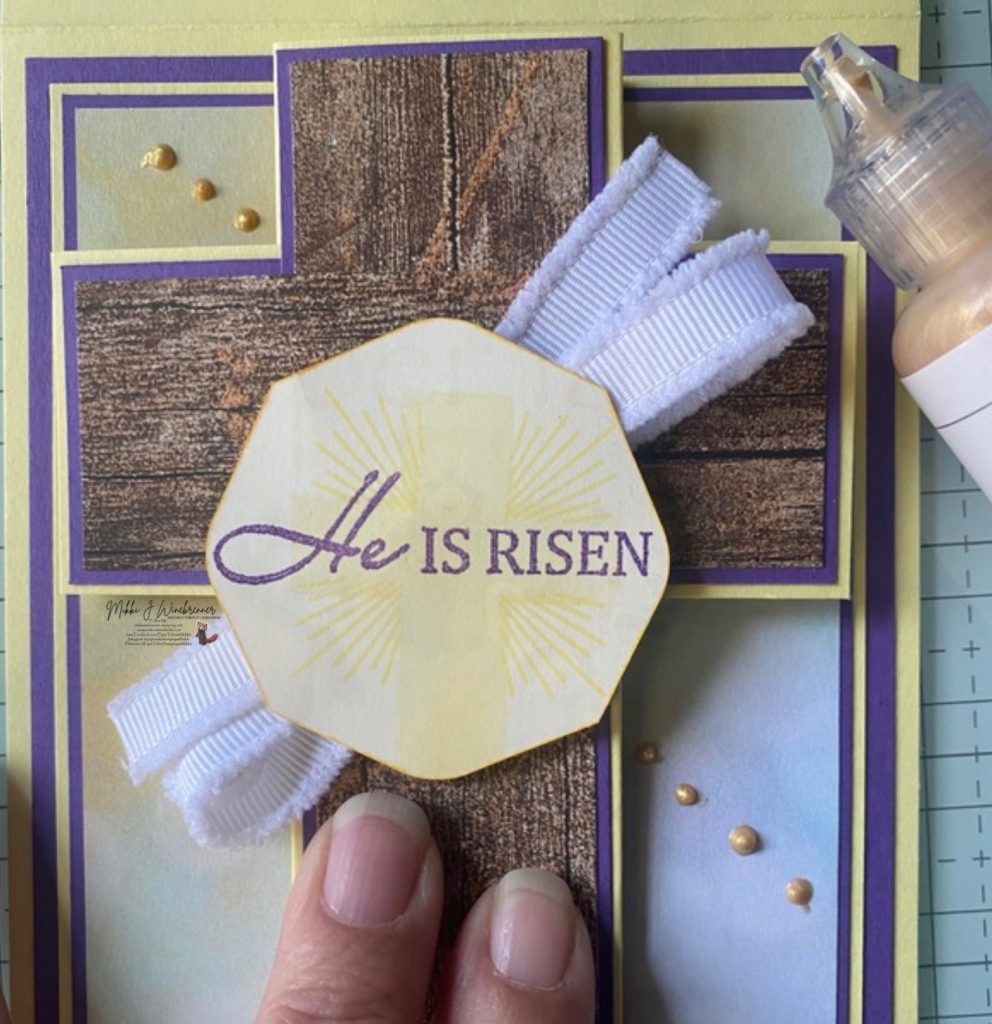
- Attach the 2 small Gorgeous Grape panels over the Lemon Lolly and the Country Woods DSP over that. With this section you really have to build it in layers to get a smooth cross.
- Attach the cross base to the remaining Gorgeous Grape. I started with the right side, glueing and lining it up, again grabbing my ruler (yes I have 4 – 6” rulers at my finger tips, I like to lose them!) and guiding the left in place.
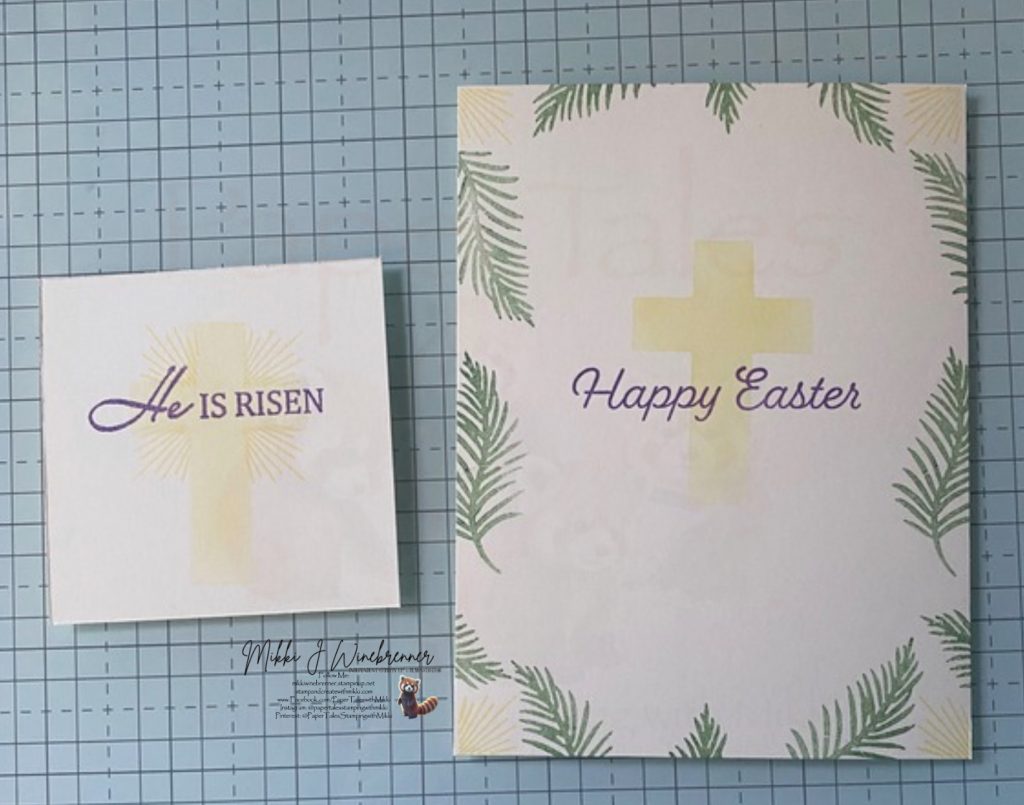
- Stamp the sentiment “He Is Risen” to the center of the small Very Vanilla piece with Gorgeous Grape stamp pad.
- My He is Risen is different because this is the stamp that my awesome self lost 😞
- Stamp the solid cross behind the sentiment with Lemon Lolly – stamp off first then stamp the image. Stamp the sunburst on the corners of the cross again with Lemon Lolly full ink.
- Stamp the palms around the edge of the large Very Vanilla piece with Garden Green and the solid cross stamped off once with Lemon Lolly in the center. I stamped my Happy Easter (From the Easter Bunny 2024 Set) in Gorgeous Grape.
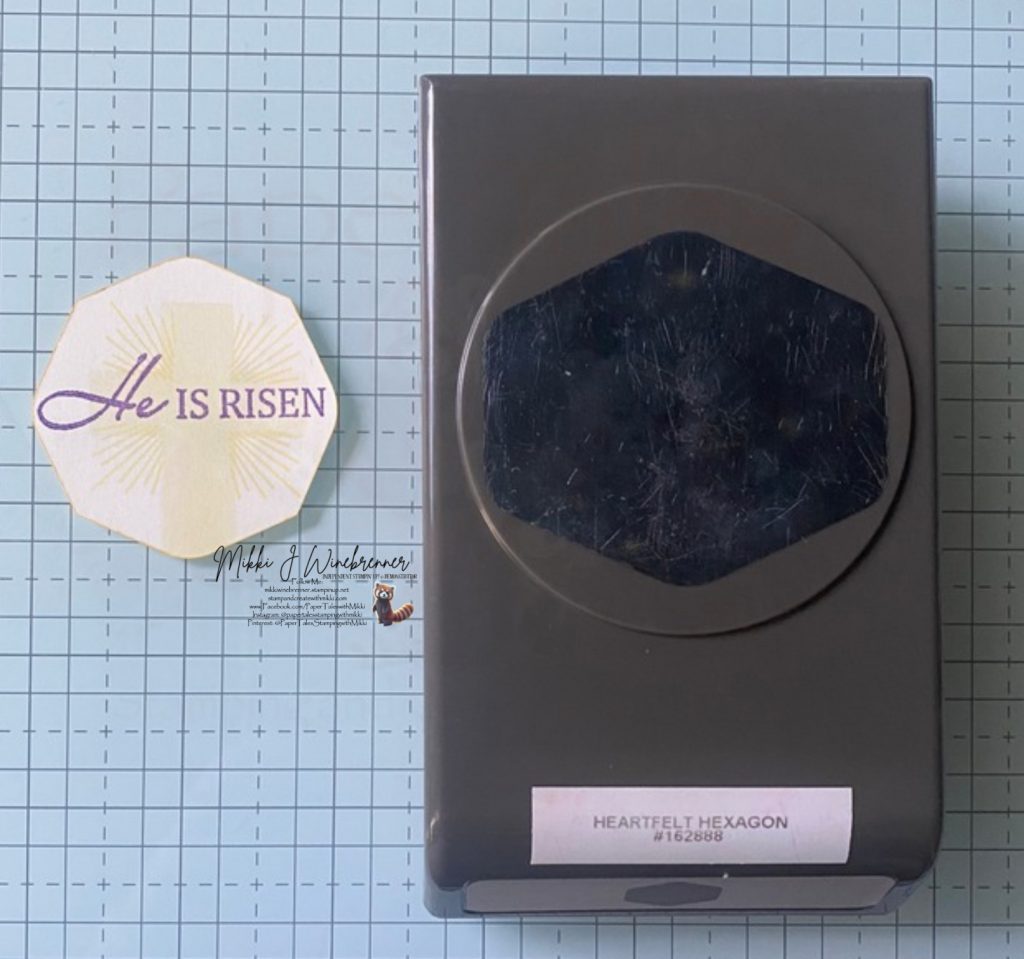
- Punch the sentiment out with the Heartfelt Hexagon Punch. Do this twice – once up and down and again side to side.
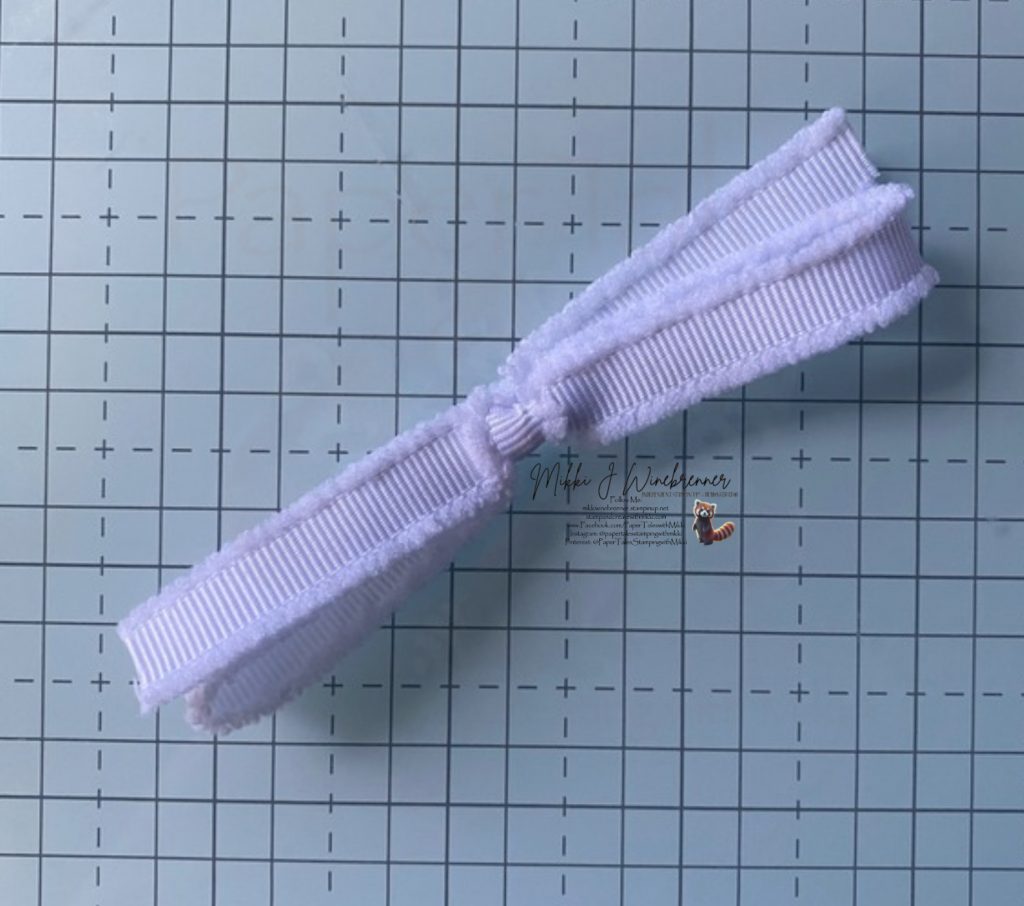
- Tie a large bow (approximately 3-1/2” long) with White Frayed ribbon. Attach that to the back of the sentiment piece with a glue dot and attach to the center of the cross with dimensionals double stacked.
- Attach the cross piece to the Lemon Lolly Base. Add a few dots of Gold Metallic Enamel Effects to the upper left and lower right sides of the cross and a swallow if you choose.
NOW YOU HAVE AN AWESOE EASTER CARD TO SEND TO SOMEONE SPECIAL!
PLEASE BE AWARE THAT SENDING THIS CARD THROUGH THE USPS WILL COST EXTRA SHIPPING BECAUSE OF THE THICKNESS AND MOST LIKELY NEEDING TO BE HAND STAMPED. AN ALTERNATIVE ROUTE WOULD BE A BUBBLE ENVELOPE OR HAND DELIVERY.
I have a full list of products used on this card, as well as links to them in my store below. If you have any questions please do not hesitate to reach out to me either in the comments below or privately!
Happy Stamping!!
Product List")

 Frayed Grosgrain Ribbon")


 Designer Series Paper")


 Designer Series Paper")
")

Ink Card Stock Tools & Adhesive Ribbon & Trim Accessory
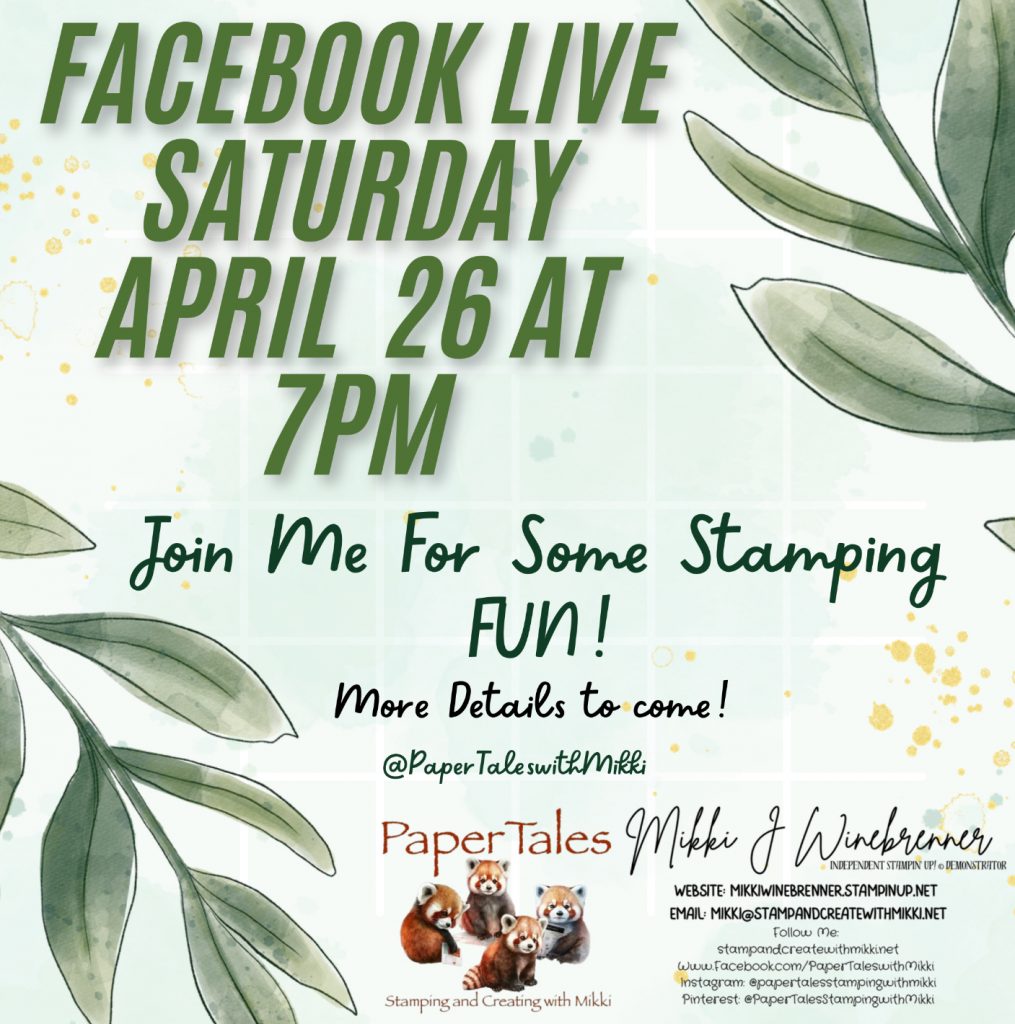
We are doing new and frighting things over on Facebook!
I’ve taken a leap into the Live Stream world with a monthly card class. I will have video recordings uploaded to YouTube and will have them linked in here as well.
Just a few little details about these classes. First and foremost, they are FREE!!
I will provide the measurements and products I use during the classes but the creativity is limitless and you can choose whatever products you would like. There is no right or wrong.
These classes are really just to bring us all together once a month and have some crafty time and relax. The class will be the last Saturday of the Month at 7pm CST and last about an hour.
The April 26th class has not been decided on as of yet. I’m leaning to Mother’s Day theme but unclear on the set/bundle to use. I’ll keep you posted. You can also follow my Facebook page to get all the latest information!
With that said, I’m always open to suggestions and anything you all might be interested in or a theme you would like to see! Just give me a shout over on my social media pages and let me know!
I will post more details on the projects as we get close to the date. This will allow you to prep as much as you need.
If you have any questions please reach out to me.
Happy Stamping!!
My Favorite Stampin Tools
| 1.Take Your Pick | |
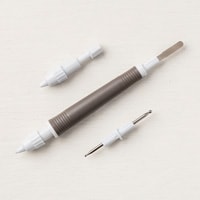 |
So many uses and attachments for this little tool that makes crafting so much easier! I have 3 currently in my tools drawer! |
| 2.Stampin’ Glass Mat Studio (Imperial) | |
 |
This glass mat is amazing! I love that you can write on it, stamp on it and use it to line up paper. Easy to use and super easy to clean up when you’re all done! |
| 3.Simply Scored | |
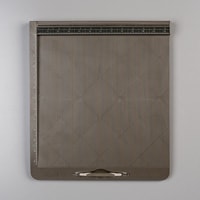 |
The Simply Scored is in my top 5 because it make scoring easy when you’re doing a bunch of scoring at once or intricate score marks for a fold. Also saves you from cutting when wanting to score! The diagonal board is also super helpful when doing scores for envelopes and boxes. |
| 4.Blending Brushes | |
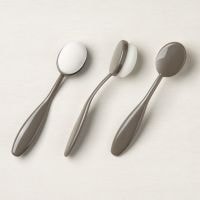 |
Oh my blending brushes. These little fellows are a blessing when it comes to adding color and making scenes! I could write an entire book on why you should have these in your tool bag! |
| 5.Soft Pastels Assortment | |
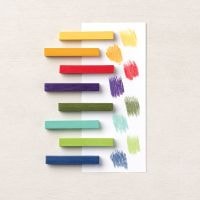 |
These are a sentimental favorite. I have been using soft pastels in art work since high school. They are a unique color tool that believe it or not has a lot of different uses and color techniques. If you want to explore coloring then grab a set of these! |
")
")
")
")


