
Welcome!
This evening we start a new series. Instead of focusing on just one Suite/Bundle, we are gong to work through a theme; Easter’s On It’s Way!

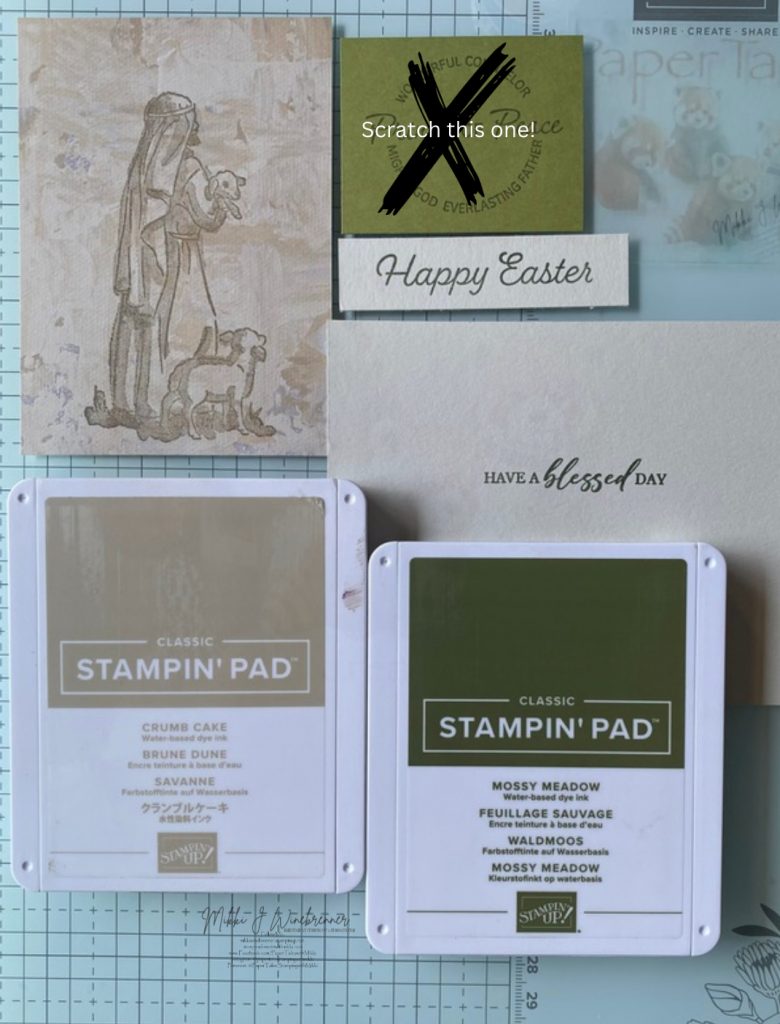
Stampin’ Up!©️ Shepard’s Care Cling Stamp Set is what we will work with tonight.
This stamp set was originally released during the Christmas season online exclusive. When you look at the set you can see all the possibilities outside of Christmas!
I have 2 cards to show you, only one of them I will walk step by step through with photos. The second one is just an extra to share because it turned out so amazing!
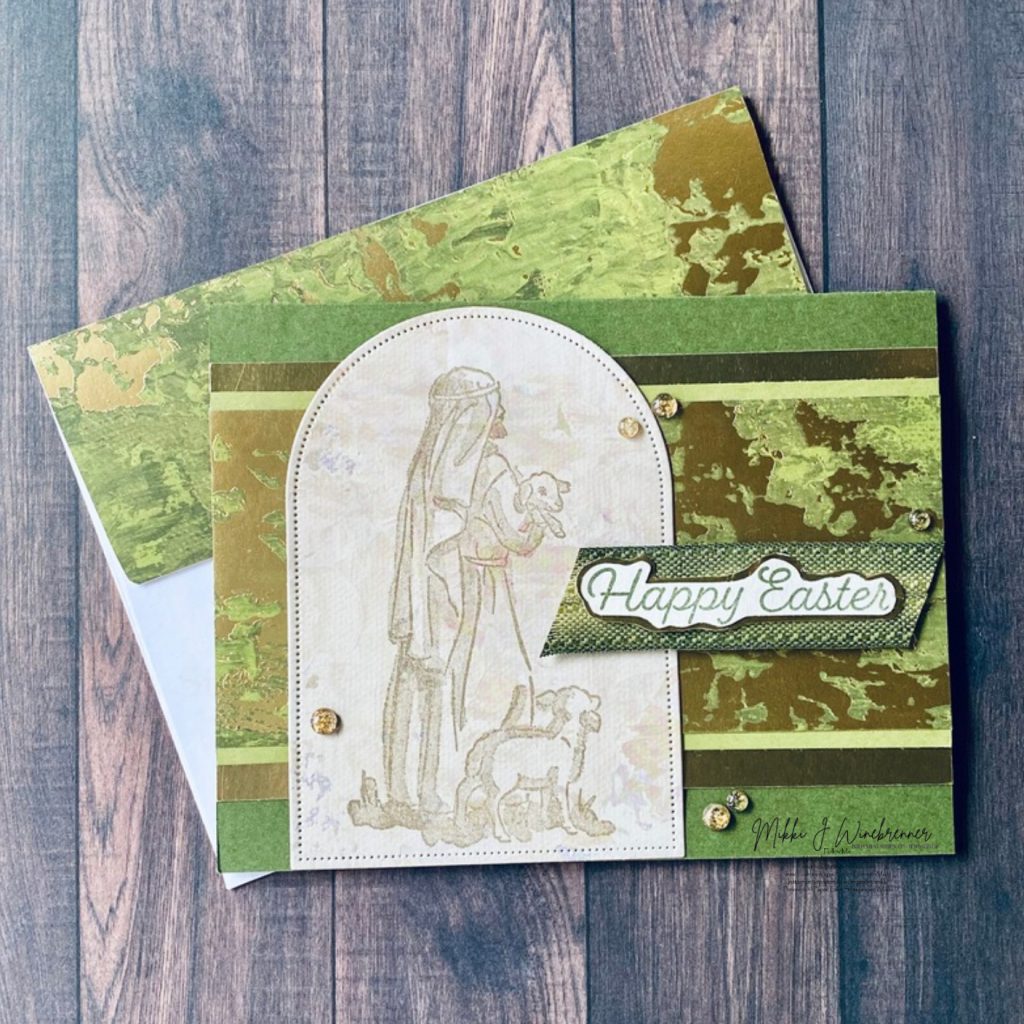
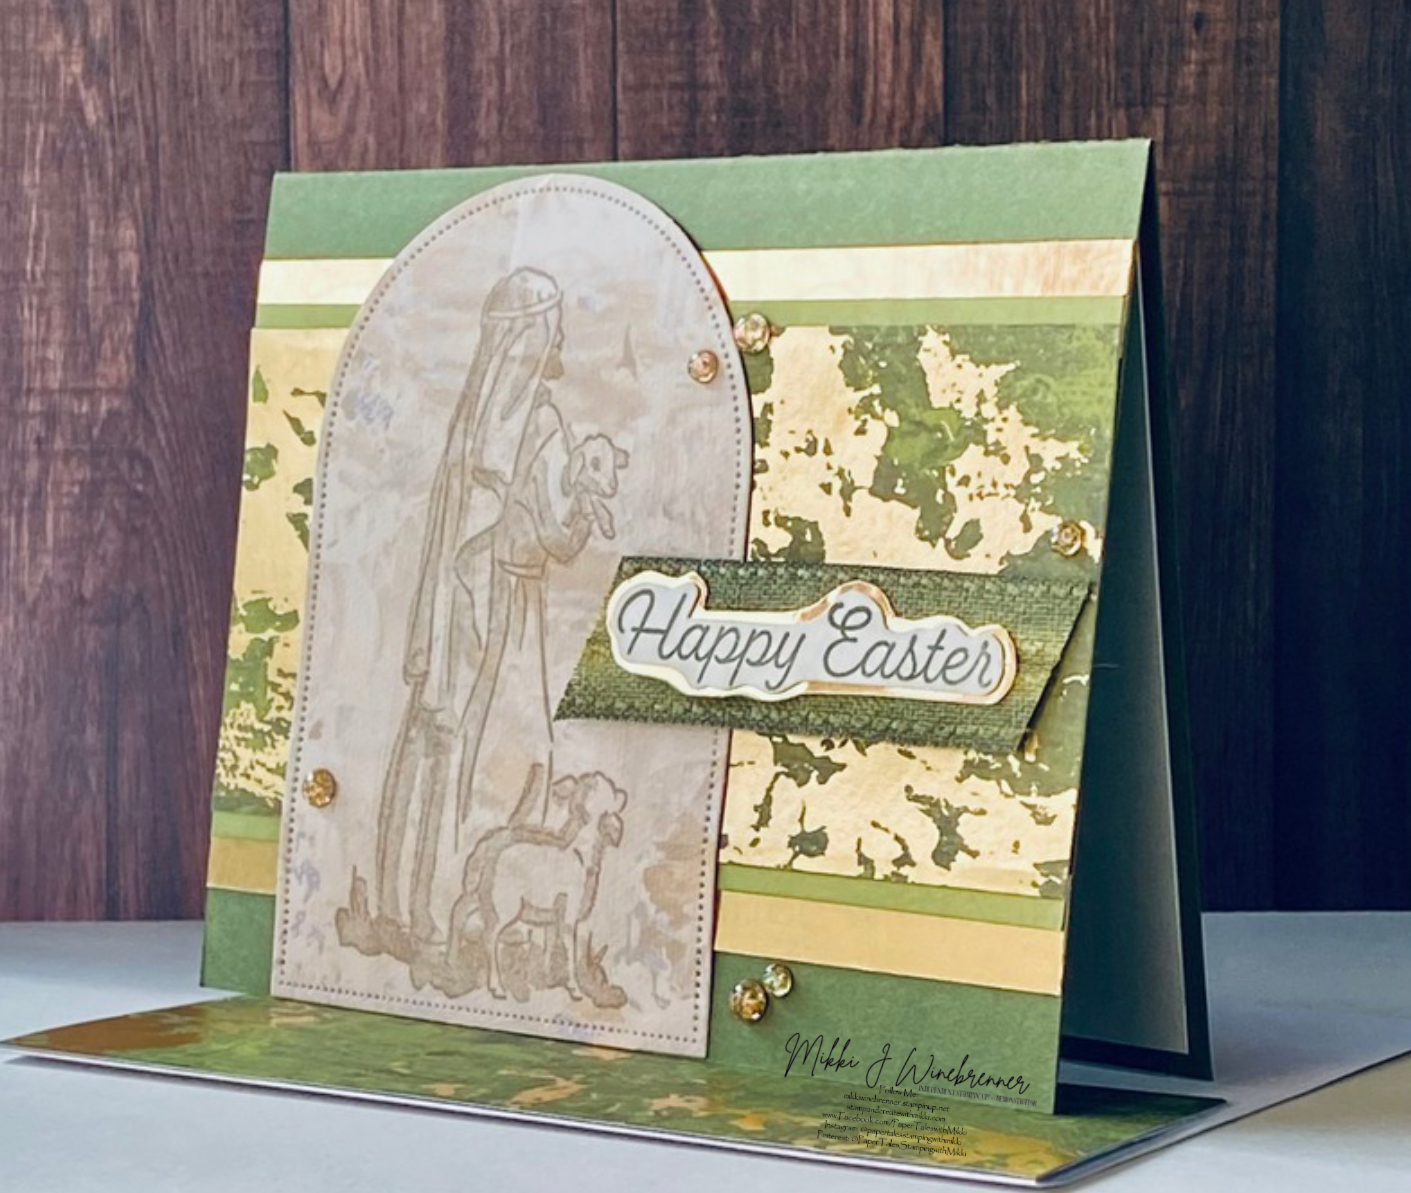
Starting with the measurements for the Mossy Meadow card:
Mossy Meadow 8-1/2” x 11” Cardstock: 5-1/2” x 8-1/2” scored at 4-1/4”
Gold Foil: 1/2” x 5-1/2” (x2), 1” x 2-3/4”
Old Olive: 1/4” x 5-1/2” (x2)
Season of Elegance Specialty DSP: (Green) 2-1/2” x 5-1/2”, 2” x 5-3/4” and 1/4” x 4-1/4”; (Beige) 3-1/4” x 4-1/2”
Basic Beige 8-1/2” x 11” Cardstock: 3/4” x 2-1/2” and 4” x 5-1/4”
For ink I am using Crumb Cake and Mossy Meadow Classic Stamp Pad and Mossy Meadow Stampin’ Blend.
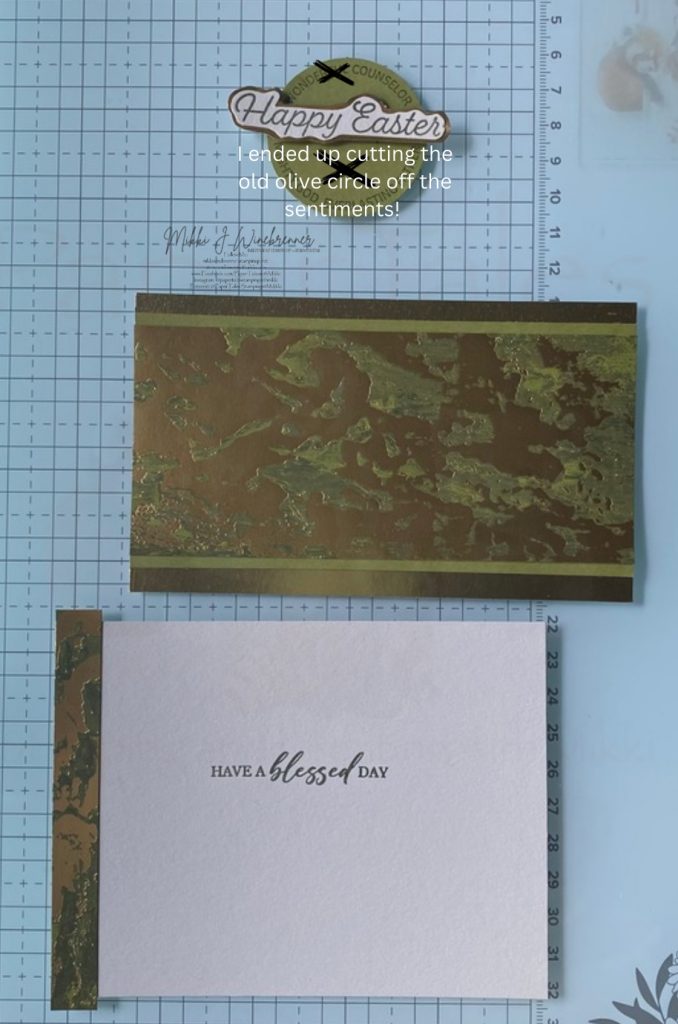
Before we jump into the step by step, there is one step that I ended up cutting out (literally 🤣). Unfortunately I had already taken the photos so I will just point it out with a note on the photo.
Disclaimer: I am using a retired set in this one. I wanted a specific look for the Happy Easter sentiment and I found it in the Stampin’ Up! Easter Bunny Photopolymer Stamp Set. I believe this one just retired last April.
Lets create!
Cut all the paper down to size.
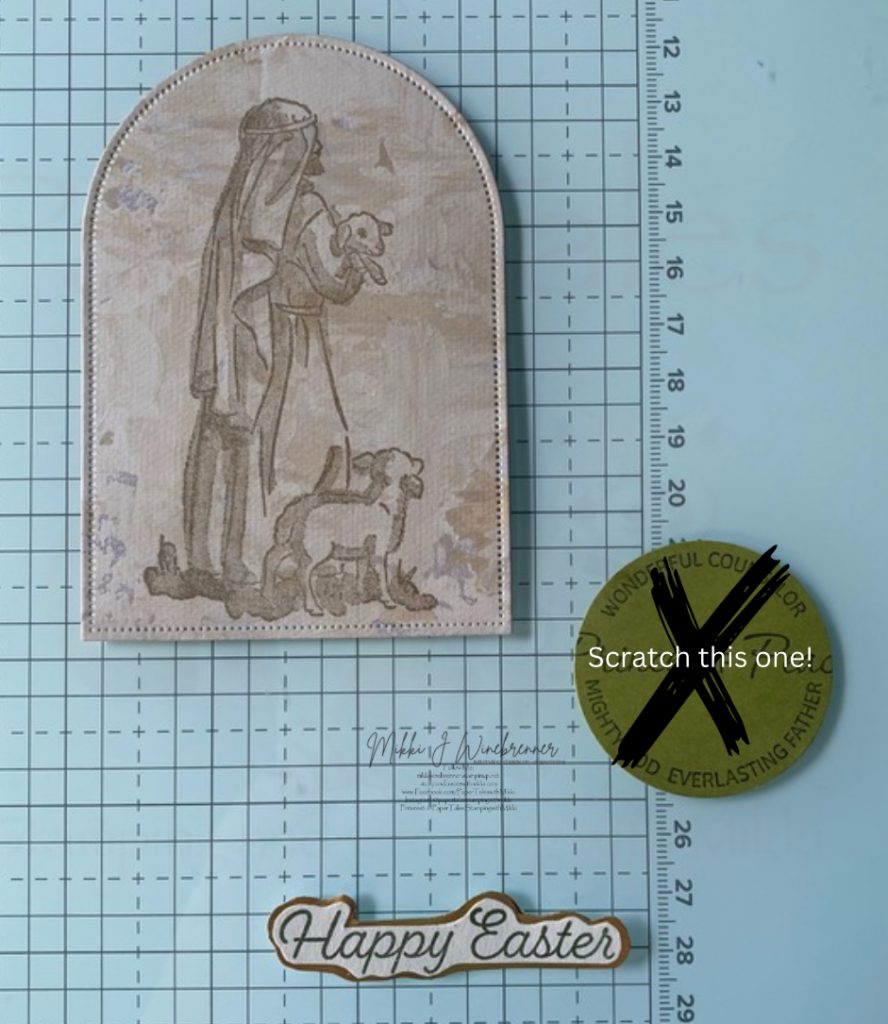
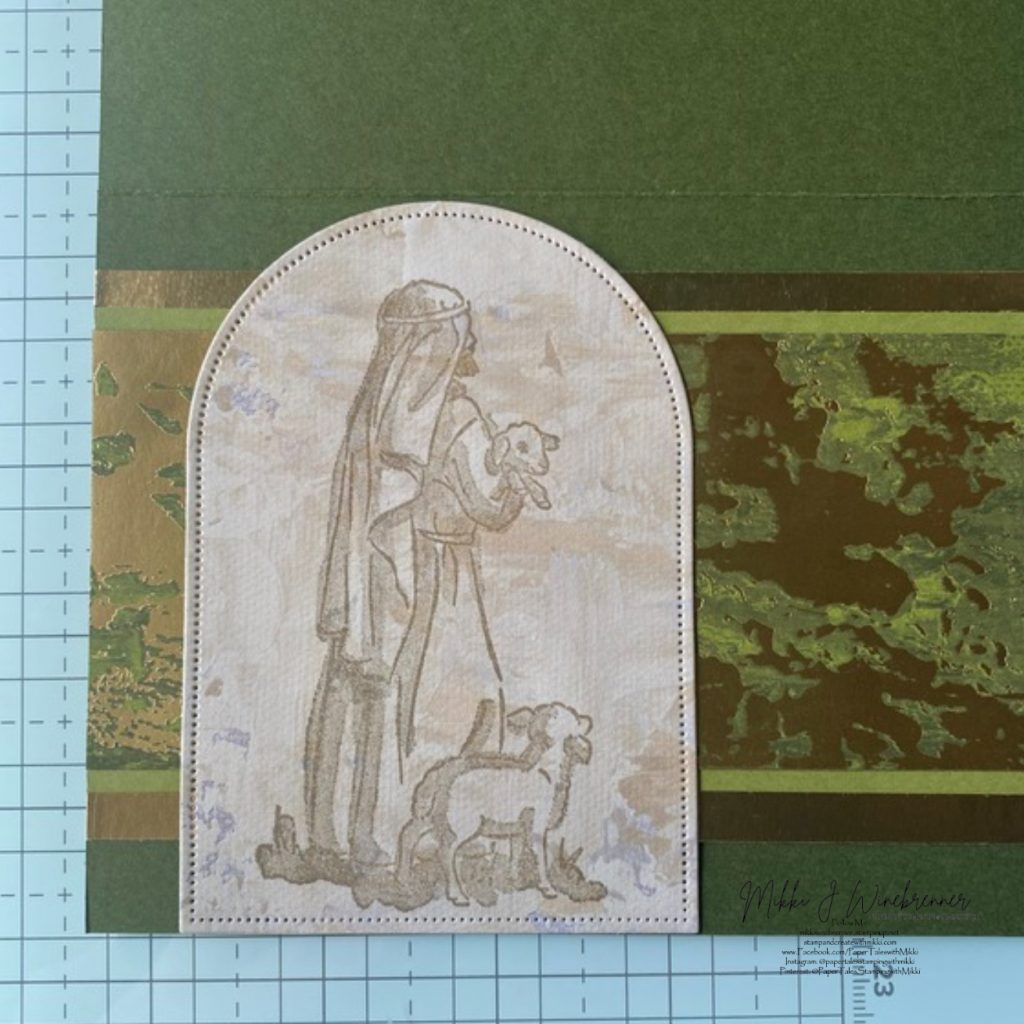
Stamp the Shepard in Crumb Cake on the Beige Season of Elegance Piece
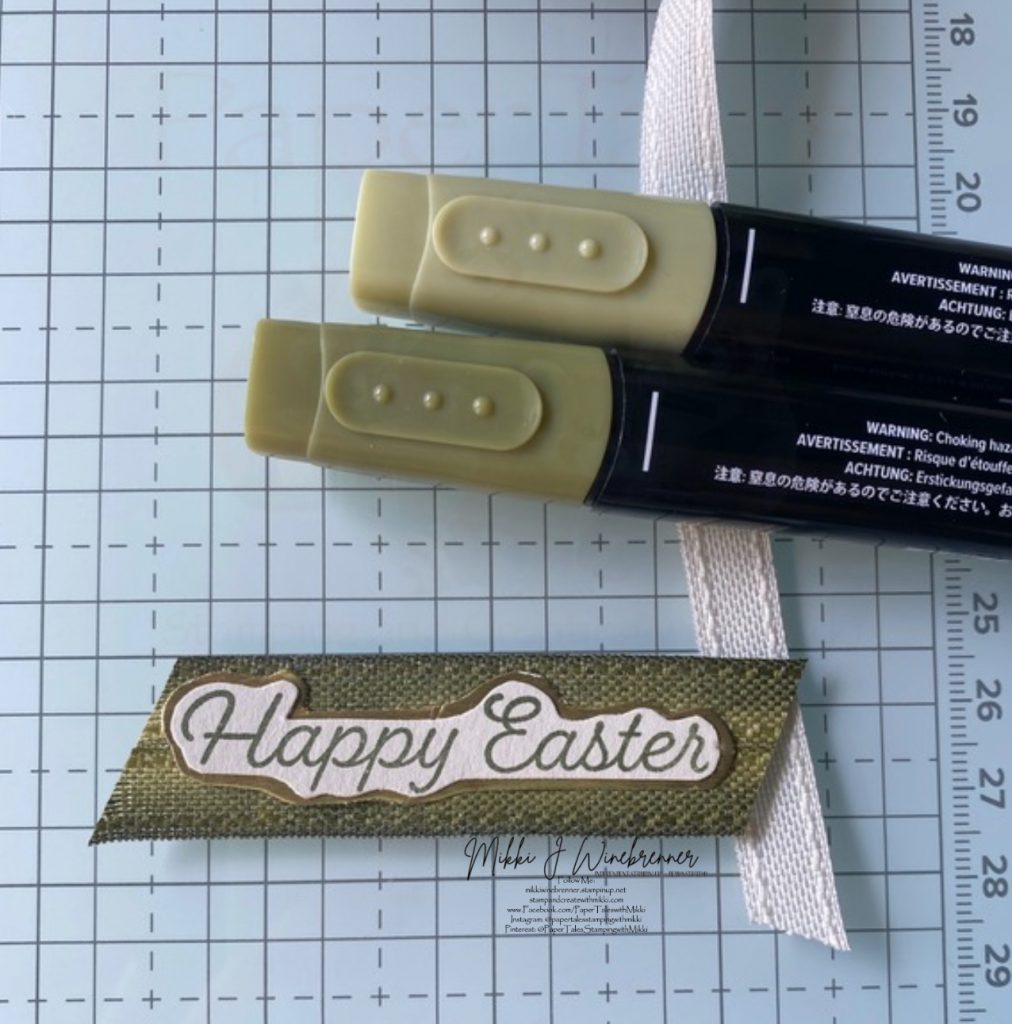
Stamp Happy Easter onto the Basic Beige piece with Mossy Meadow and your inside saying on the large Basic Beige also with Mossy Meadow.
Cut out the Shepard with the Everyday Arches Dies (4th one in) and your sentiment out with paper snips.
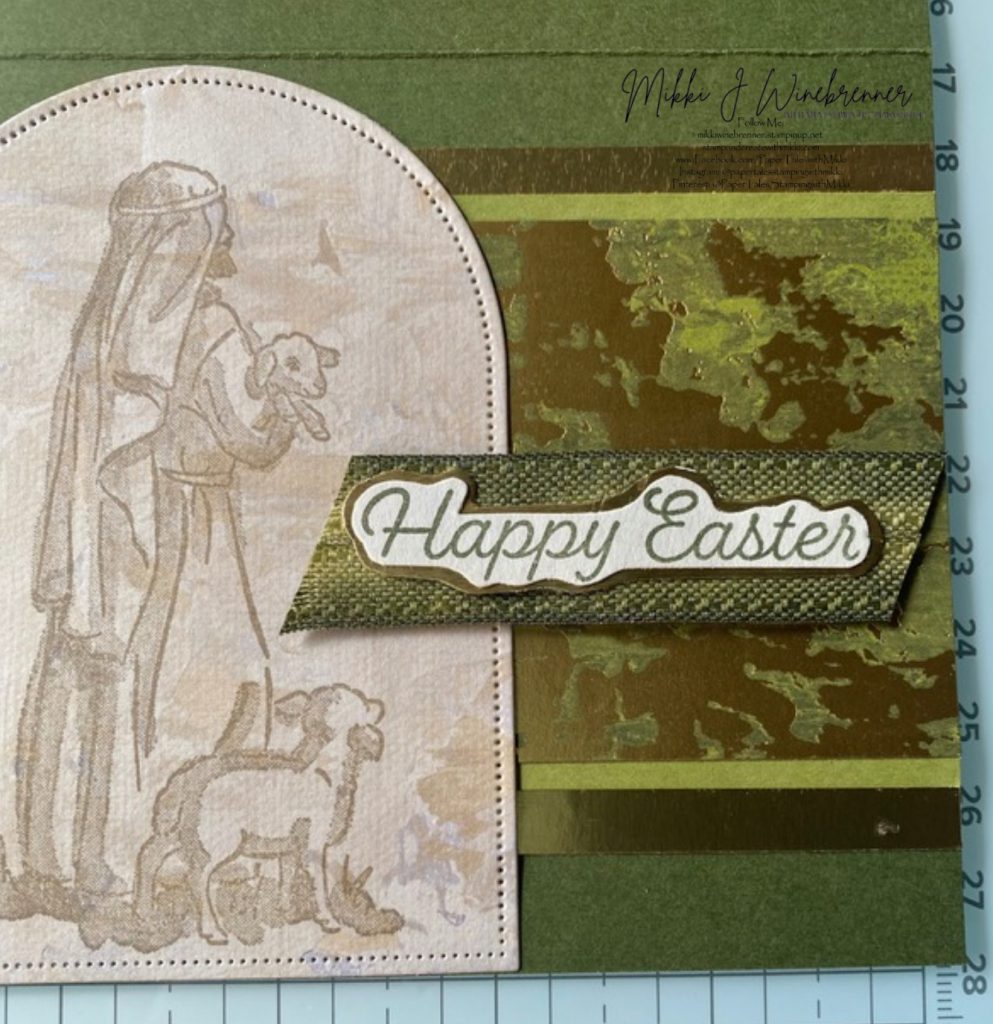
Attach the sentiment to the small Gold Foil fussy cut it to match.
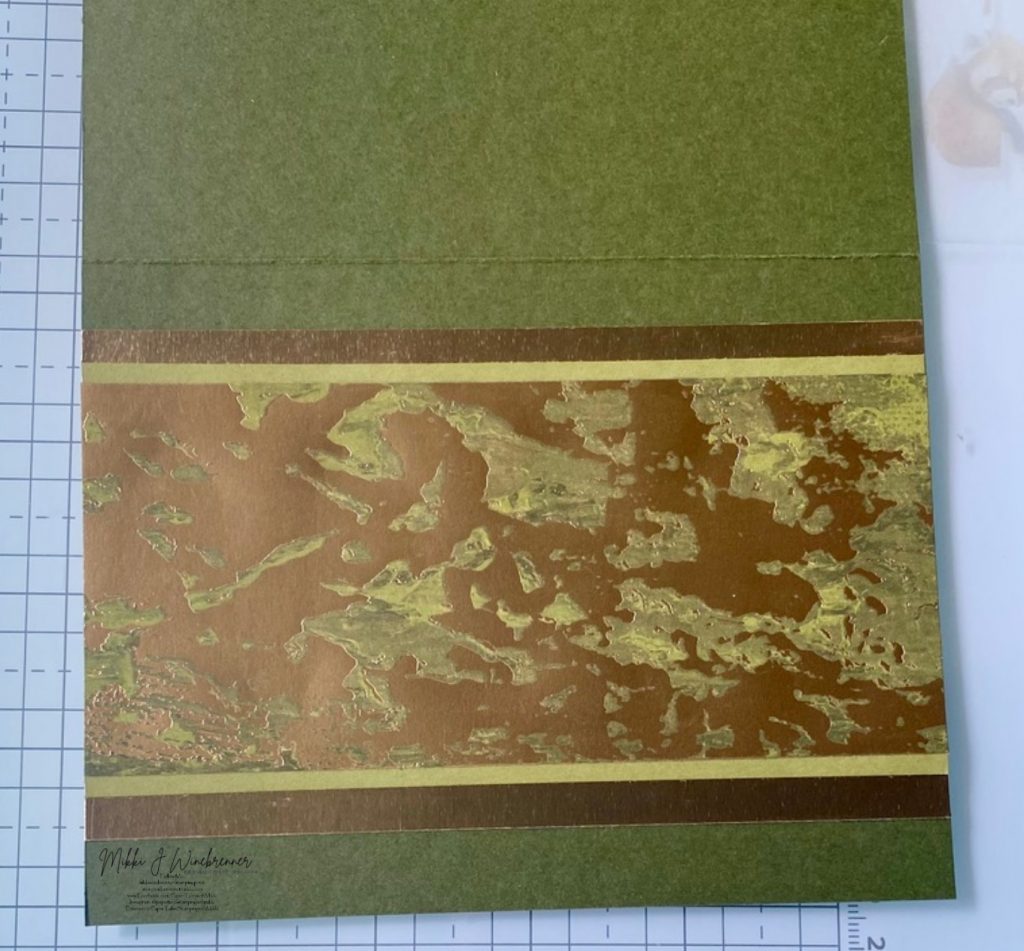
Attach large green DSP to the 2 Old Olive strips one on top and one on bottom.
Do this again with the Gold Foil strips.
Attach the small green DSP to the left edge of the large Basic Beige.
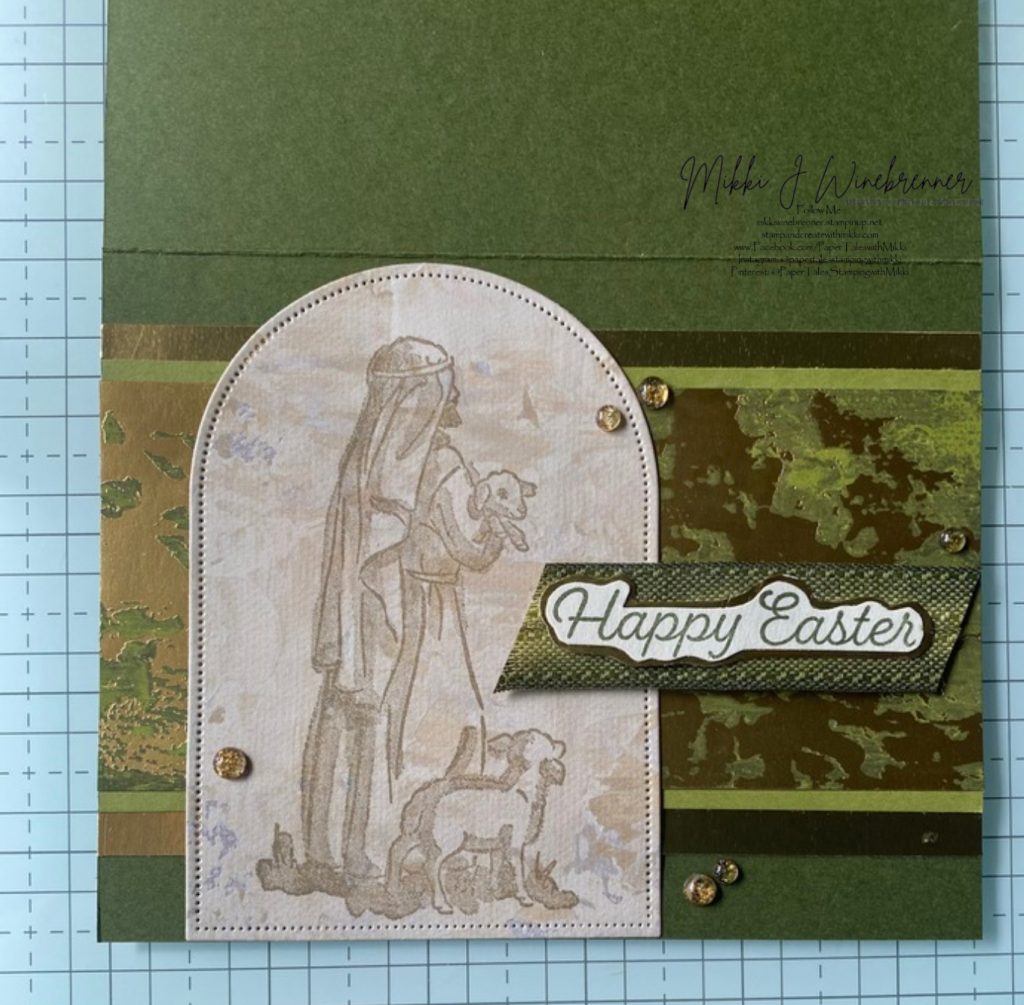
Attach the entire DSP/Old Olive/Gold Foil piece to the Mossy Meadow card base.
Attach the Shepard to the left side of the base – it will go from top to bottom.
Color 2 Basic Beige ribbon with Mossy Meadow Stampin blends (Light is in the center).
Attach the sentiment to the ribbon and then to the card with dimensionals.
Color a few Iridescent Foil Gems with Crumb Cake Stampin Blends and add them around the card.
Attach the remaining 2” piece of DSP to the envelope flap.

AND NOW YOU HAVE AN ELEGANT EASTER CARD TO SEND TO SOMEONE SPECIAL!
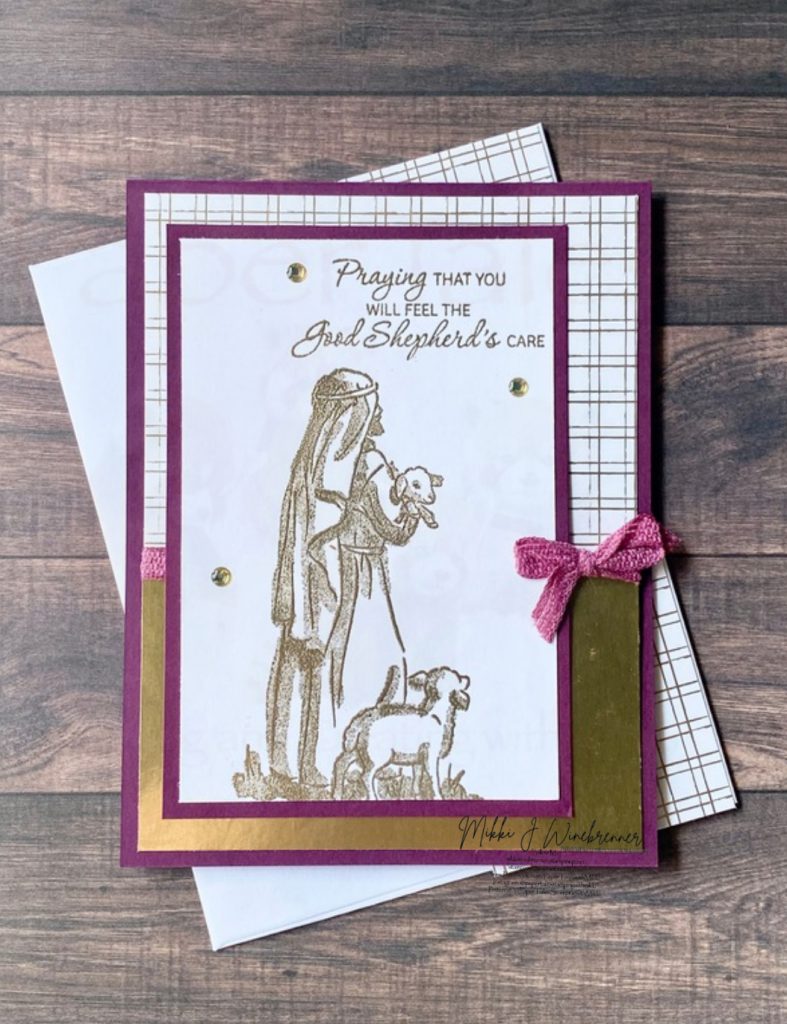
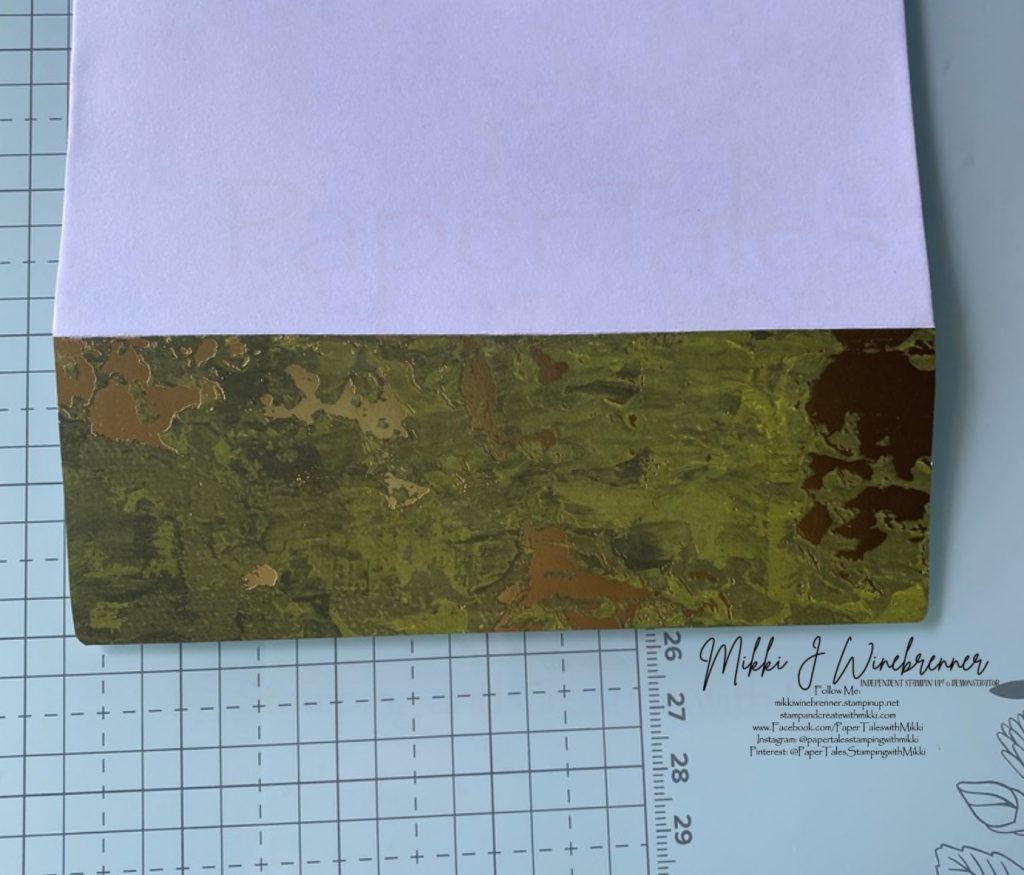
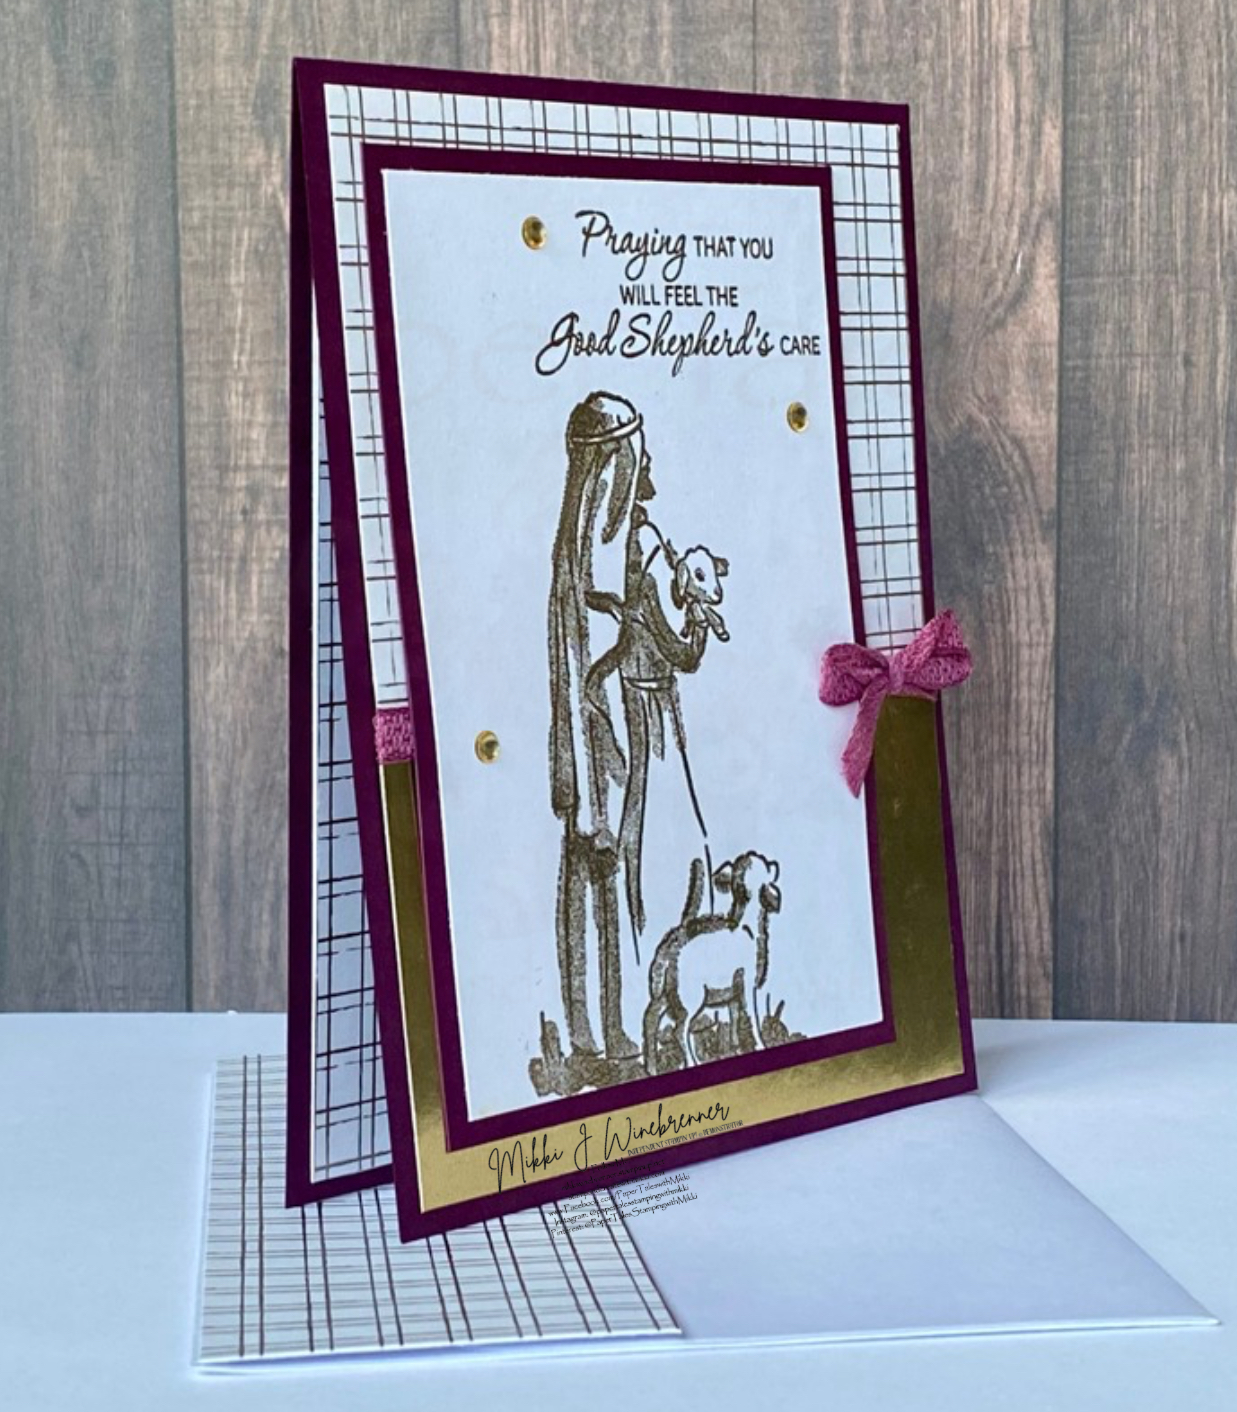
The second card I have to show you also using the Shepard’s Care Stamp Set. This one I used Blackberry Bliss and Basic White Cardstock, Regal Distressed Patterns Specialty DSP and Gold Foil.
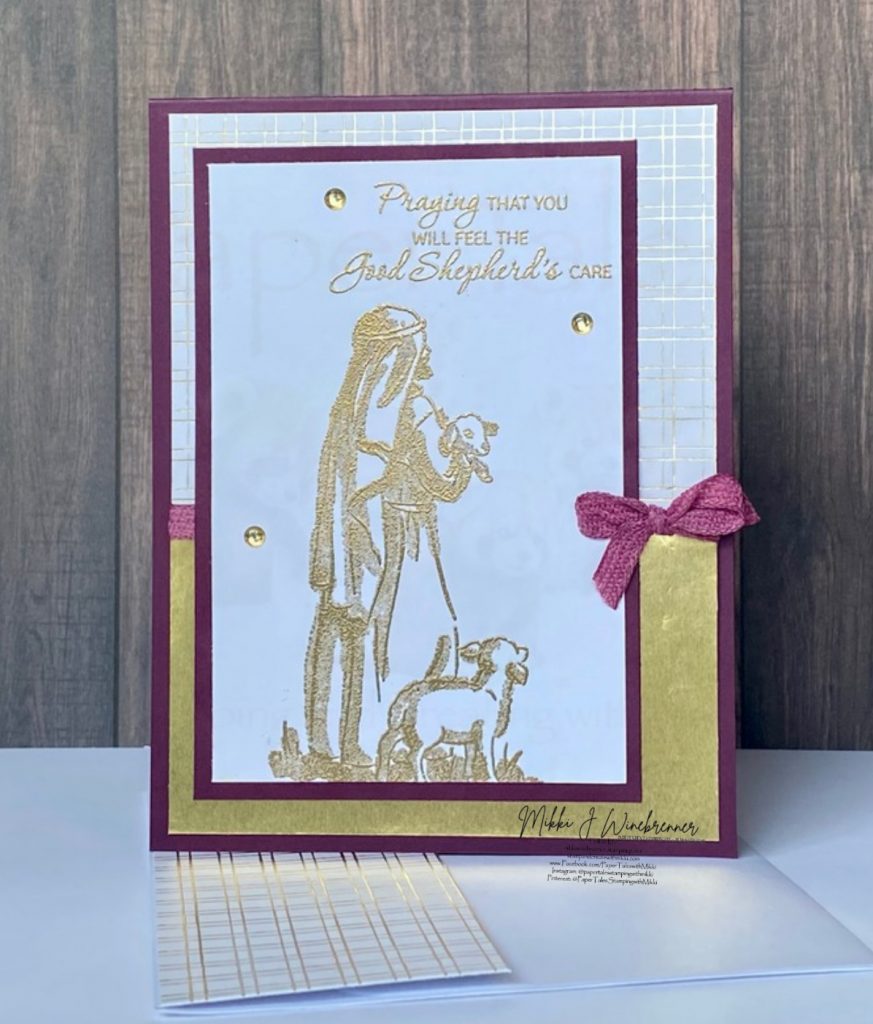
As you can see all the stamping is one with VersaMark and Gold Embossing Powder. I haven’t stamped the inside yet but I will have Happy Easter stamped in Blackberry Bliss.
The ribbon I used is White 1/4” Ribbon that I colored with Blackberry Bliss Dark Stampin Blends. Yes I have this obsession with taking White ribbon and coloring it to match what I need!
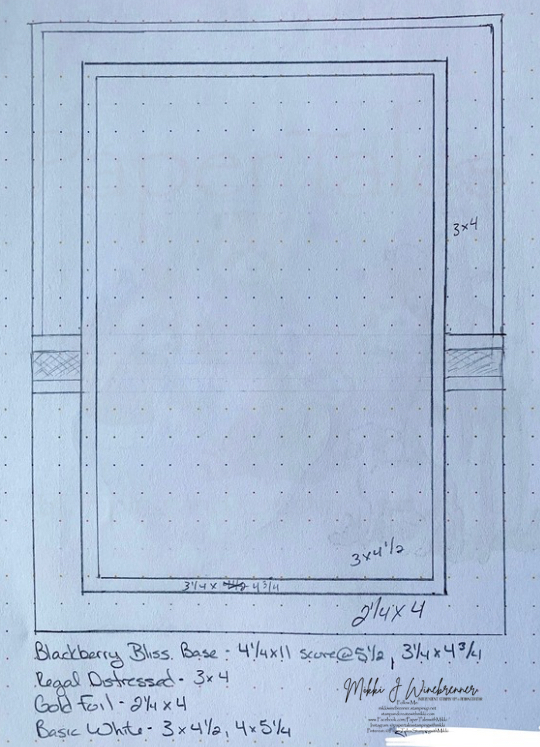
I am including the sketch of the card for you to have access to the measurements.
I have a full list of products used in both cards, as well as links to them in my store below. If you have any questions please do not hesitate to reach out to me either in the comments below or privately!
Happy Stamping!!
Product List![Paper Trimmer [ 152392 ]](https://assets1.tamsnetwork.com/images/EC042017NF/152392s.jpg "Paper Trimmer [ 152392 ]")
![Bone Folder [ 102300 ]](https://assets1.tamsnetwork.com/images/EC042017NF/102300s.jpg "Bone Folder [ 102300 ]")
![Paper Snips [ 103579 ]](https://assets1.tamsnetwork.com/images/EC042017NF/103579s.jpg "Paper Snips [ 103579 ]")
![Stampin' Dimensionals [ 104430 ]](https://assets1.tamsnetwork.com/images/EC042017NF/104430s.jpg "Stampin' Dimensionals [ 104430 ]")
![Mossy Meadow 8-1/2" X 11" Cardstock [ 133676 ]](https://assets1.tamsnetwork.com/images/EC042017NF/133676s.jpg "Mossy Meadow 8-1/2\" X 11\" Cardstock [ 133676 ]")
![Mossy Meadow Stampin' Blends Combo Pack [ 154890 ]](https://assets1.tamsnetwork.com/images/EC042017NF/154890s.jpg "Mossy Meadow Stampin' Blends Combo Pack [ 154890 ]")
![Old Olive 8-1/2" X 11" Cardstock [ 100702 ]](https://assets1.tamsnetwork.com/images/EC042017NF/100702s.jpg "Old Olive 8-1/2\" X 11\" Cardstock [ 100702 ]")
![Stampin' Cut & Emboss Machine [ 149653 ]](https://assets1.tamsnetwork.com/images/EC042017NF/149653s.jpg "Stampin' Cut & Emboss Machine [ 149653 ]")
![Gold Foil Sheets [ 132622 ]](https://assets1.tamsnetwork.com/images/EC042017NF/132622s.jpg "Gold Foil Sheets [ 132622 ]")
![Crumb Cake Classic Stampin' Pad [ 147116 ]](https://assets1.tamsnetwork.com/images/EC042017NF/147116s.jpg "Crumb Cake Classic Stampin' Pad [ 147116 ]")
![Season Of Elegance 12" X 12" (30.5 X 30.5 Cm) Specialty Designer Series Paper [ 164144 ]](https://assets1.tamsnetwork.com/images/EC042017NF/164144s.jpg "Season Of Elegance 12\" X 12\" (30.5 X 30.5 Cm) Specialty Designer Series Paper [ 164144 ]")
![Basic Beige 3/8" (1 Cm) Bordered Ribbon [ 163788 ]](https://assets1.tamsnetwork.com/images/EC042017NF/163788s.jpg "Basic Beige 3/8\" (1 Cm) Bordered Ribbon [ 163788 ]")
![Basic Beige 8 1/2" X 11" Cardstock [ 164511 ]](https://assets1.tamsnetwork.com/images/EC042017NF/164511s.jpg "Basic Beige 8 1/2\" X 11\" Cardstock [ 164511 ]")
![Iridescent Foil Gems [ 162842 ]](https://assets1.tamsnetwork.com/images/EC042017NF/162842s.jpg "Iridescent Foil Gems [ 162842 ]")
![Everyday Arches Dies [ 164629 ]](https://assets1.tamsnetwork.com/images/EC042017NF/164629s.jpg "Everyday Arches Dies [ 164629 ]")
![Crumb Cake Stampin' Blends Combo Pack [ 154882 ]](https://assets1.tamsnetwork.com/images/EC042017NF/154882s.jpg "Crumb Cake Stampin' Blends Combo Pack [ 154882 ]")
![Shepherd's Care Cling Stamp Set (English) [ 164300 ]](https://assets1.tamsnetwork.com/images/EC042017NF/164300s.jpg "Shepherd's Care Cling Stamp Set (English) [ 164300 ]")
![Easter Bunny Photopolymer Stamp Set (English) [ 160272 ]](https://assets1.tamsnetwork.com/images/EC042017NF/160272s.jpg "Easter Bunny Photopolymer Stamp Set (English) [ 160272 ]")
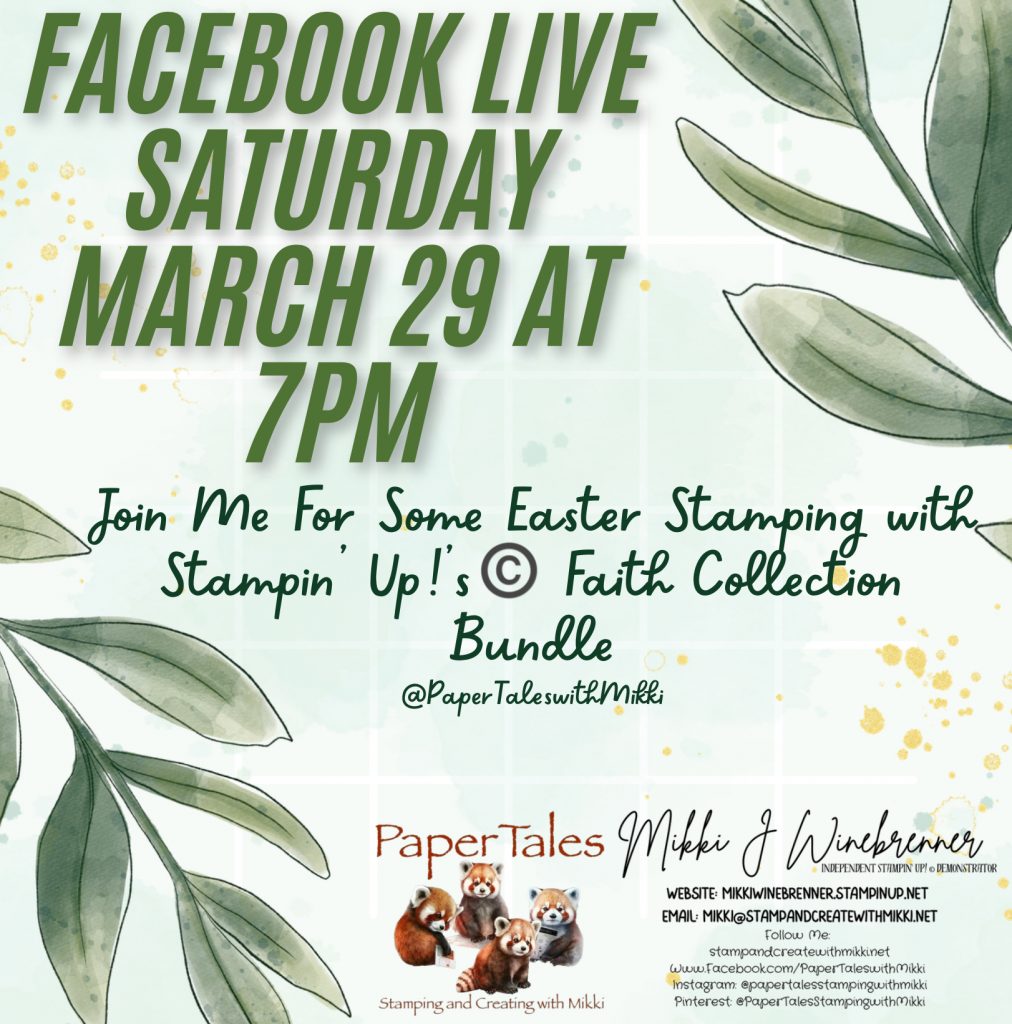
We are doing new and frighting things over on Facebook!
I’ve taken a leap into the Live Stream world with a monthly card class. I will have video recordings uploaded to YouTube and will have them linked in here as well.
Just a few little details about these classes. First and foremost, they are FREE!!
I will provide the measurements and products I use during the classes but the creativity is limitless and you can choose whatever products you would like. There is no right or wrong.
These classes are really just to bring us all together once a month and have some crafty time and relax. Going forward the classes will be the last Saturday of the Month at 7pm CST and last about an hour.
The March 29th class will be featuring Stampin’ Up! ©️ Online Exclusive Faith Collection Bundle with a focus on Easter.
I don’t have all details planned out yet but this will be an easier project but not a simple stamping card although I will have samples of how you can use just the stamp set. It will be fun!
I will post more details on the projects as we get close to the date. This will allow you to prep as much as you need.
If you have any questions please reach out to me.
Happy Stamping!!


My Favorite Stampin Tools
| 1.Take Your Pick | |
 |
So many uses and attachments for this little tool that makes crafting so much easier! I have 3 currently in my tools drawer! |
| 2.Stampin’ Glass Mat Studio (Imperial) | |
 |
This glass mat is amazing! I love that you can write on it, stamp on it and use it to line up paper. Easy to use and super easy to clean up when you’re all done! |
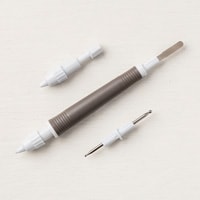
| 3.Simply Scored | |
 |
The Simply Scored is in my top 5 because it make scoring easy when you’re doing a bunch of scoring at once or intricate score marks for a fold. Also saves you from cutting when wanting to score! The diagonal board is also super helpful when doing scores for envelopes and boxes. |
| 4.Blending Brushes | |
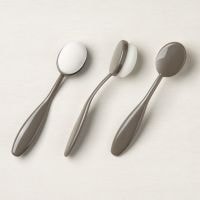 |
Oh my blending brushes. These little fellows are a blessing when it comes to adding color and making scenes! I could write an entire book on why you should have these in your tool bag! |
| 5.Soft Pastels Assortment | |
 |
These are a sentimental favorite. I have been using soft pastels in art work since high school. They are a unique color tool that believe it or not has a lot of different uses and color techniques. If you want to explore coloring then grab a set of these! |
")
")
")
")


